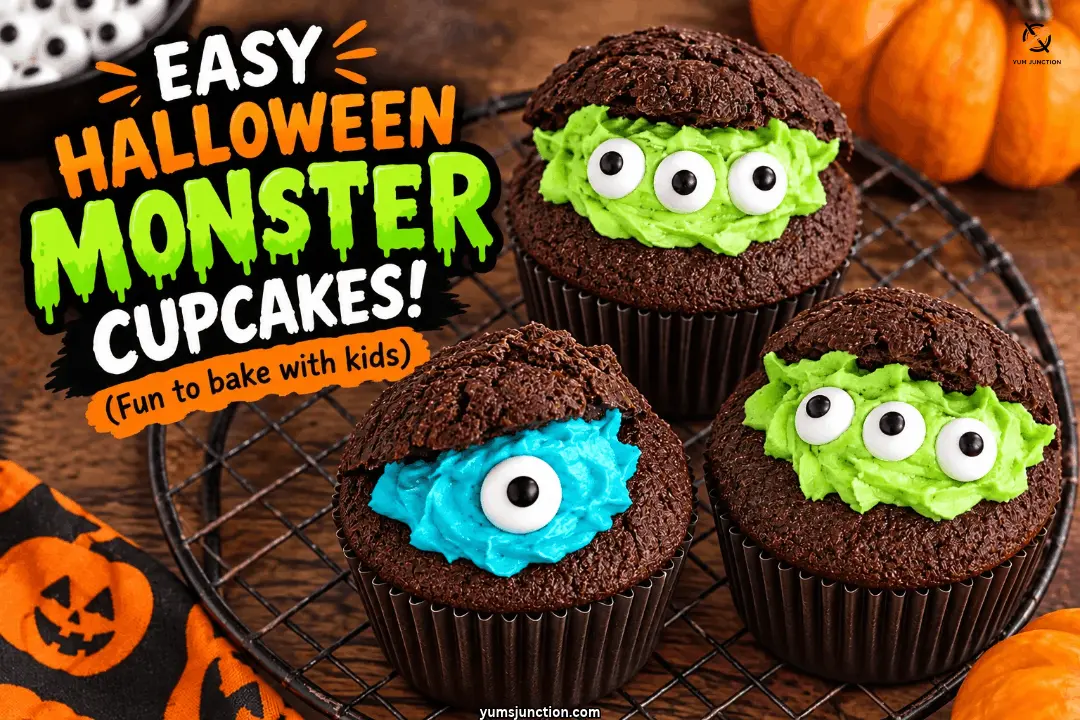
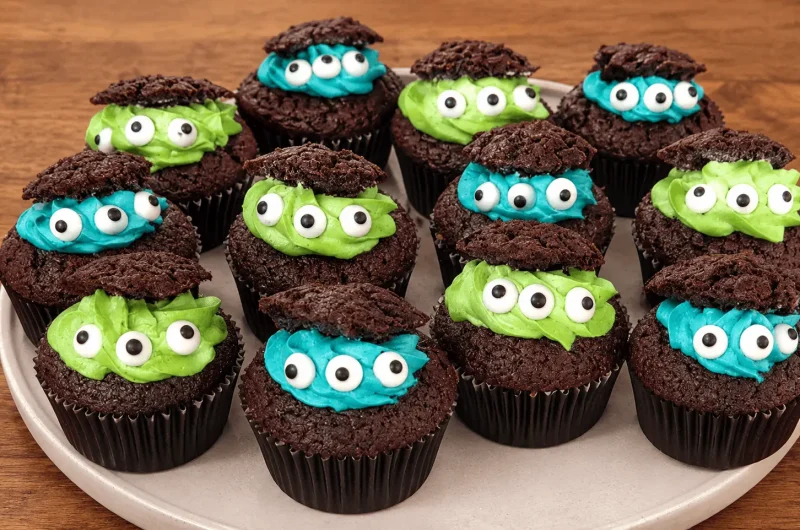
These monster chocolate cupcakes use a simple “equal weight” method, 6 oz baking margarine, 6 oz sugar, 3 eggs, and 6 oz of self raising flour and cocoa, to make 12 cupcakes that bake in 15 to 20 minutes at 180°C (350°F). Once cool, you cut a circle out of the top like a butterfly cake, pipe in colored buttercream, tuck the two cake halves back in at an angle, and add edible sugar eyes so a little monster peeks out. Total time is about 1 hour 5 minutes, and they are great to make with the kids.
Halloween is coming up, and these Spooky Monster Chocolate Cupcakes are great to do with the kids. It is such a really fun and easy idea to do.
Now, I know lots of people work in grams. I generally work in grams too, but when I am doing cakes, I always work in ounces! You just have to kind of change what the equivalent is. As a rough rule, and I know lots of people do not measure their eggs, but each egg is about 2 ounces of the other mixture. So if I am using three eggs, that is 6 ounces of sugar and margarine. That is why I do it, I just find it easier!
It is a very basic recipe. Great to do if you are a good baker, a new baker, or just looking for something easy to make with the kids.
Table of Contents
Why You Will Love These Halloween Monster Cupcakes
- It Is Dead Basic: You do not need any fancy skills to pull this off. If you can mix butter and sugar together, you can make these.
- Perfect for Kids: From mixing the batter to sticking on the edible eyes, the little ones will love getting involved.
- Super Adaptable: Need them gluten free or dairy free? It takes just one simple swap, which I will explain below.
- Cute and Creepy: We use a classic butterfly cake method to make it look like a little colorful monster is peeking right out of the top of the cupcake!
If you love silly monster eyes on your Halloween treats, my Ghoulish Monster Eye Cookies are another fun, spooky bake that is easy to decorate with the kids.
What You Will Need
Special Equipment
- 12 hole cupcake or muffin tin
- Halloween themed or dark paper cupcake liners
- Stand mixer or electric hand mixer (to save your muscles!)
- Cooling rack
- Piping bags
- A small and sharp knife (adult use only)
- Toothpick (to check the cupcakes are done)
The Ingredients for the Chocolate Cakes
- 6 oz (170g) baking margarine
- 6 oz (170g) normal granulated sugar or caster sugar
- 3 large eggs
- 4 and 1/2 oz (125g) self raising flour
- 1 and 1/2 oz (42g) cocoa powder (this makes up the rest of the 6 oz total of dry ingredients!)
The Ingredients for the Buttercream Filling
Note that this makes one color. If you want two colors like my blue and green monsters, make this batch twice, or double it and split it in half!
- 6 oz (170g) icing sugar
- 3 oz (85g) baking margarine
- A splash of vanilla essence (I use the cheap Miss Molly brand, but use whatever you have!)
- Gel food coloring (blue, green, orange, or whatever spooky colors you like)
Decorations
- Edible sugar eyes (I picked mine up from Asda, but most supermarkets sell them)
US and UK Terms
- Self raising flour is self rising flour in the US. If you cannot find it, mix 1 cup (about 125g) all purpose flour with 1 1/2 teaspoons baking powder and 1/4 teaspoon salt.
- Icing sugar is powdered sugar or confectioners’ sugar, caster sugar is superfine sugar, and vanilla essence is vanilla extract.
- Most online and supermarket baking aisles stock edible sugar eyes.
Let Us Get Baking
1. Prep the Oven
Preheat your oven to 180 degrees Celsius (350 degrees Fahrenheit), or 160°C if you have a fan oven. Make sure the door stays closed so it gets nice and hot in there because preheating properly makes nice cakes! Line your baking tin with your spooky cupcake cases.
2. Cream the Marge and Sugar
Pop your baking margarine and sugar into the mixer. Give them a good mix together until they go lighter in color. It starts out a yellowy and creamy color, but keep beating until it lightens up. If you are doing this by hand with a spoon, it is going to take a little while and get your muscles going! Stop the mixer and scrape down the edges so everything is combined.
3. Add the Wet Ingredients
Crack the eggs into a bowl, then pour about half of them into the mixer along with a little bit of the flour. This stops it from splitting and stops the flour from going everywhere! Give it a mix round. Wash your hands after handling the raw eggs.
4. Add the Dry Ingredients
Add the rest of the eggs, the self raising flour, and the cocoa powder. Sifting the flour and cocoa together first helps avoid cocoa lumps. Mix until just combined. Resist tasting the raw batter, since it contains raw egg.
5. Bake
Spoon the mixture evenly into your cake cases. Pop them into the oven for about 15 to 20 minutes. Being chocolate, sometimes you cannot tell so much when they are done, but just keep an eye on them. Check by sticking a toothpick into the middle of one, which should come out clean or with a few moist crumbs, and the tops should spring back when you gently press them.
6. Cool
Leave them in the pan to cool down for a few minutes, then transfer them onto a cooling rack. Make sure they are completely cool before you start piping!
7. Whip Up the Buttercream
In a clean mixer, beat together the icing sugar, margarine, a little splash of vanilla essence, and a bit of food coloring. Sift the icing sugar first if it looks lumpy. If you need help filling your piping bag, pop it into a mug or a glass to hold it still while you spoon the mixture in.
8. Make the Monsters
Take a small knife and go into the top of the cooled cake at a slight angle. Cut a little circle out of the top, just like you are making butterfly cakes! Cut that little top circle in half and put the pieces to one side. This is a job for the grown ups, since the knife is sharp.
9. Assemble
Pipe a nice blob of your colored buttercream right into the hole in the cake. Take your two half circles and pop them back on top at an angle, so it looks like a monster is peeking out.
10. Add the Eyes
Stick your edible eyes right onto the front of the buttercream. Use one, two, or three eyes to make your little monster look as cute or creepy as you want. Enjoy!
Want even more eyeball fun? My Rice Crispy Eyeballs are a super easy, no bake Halloween treat that uses the same playful, staring eyes.
Monster Cupcake Ideas
- Silly monsters: use one, two, or three eyes on each cupcake
- Green monster cupcakes: tint the whole batch of buttercream green
- Blue and green duo: make the buttercream twice, one in each color
- Rainbow monster cupcakes: split a doubled buttercream batch into several spooky colors like green, blue, and orange
- Party platter: mix up the colors and eye counts so every monster has its own personality
What to Serve With This
- Build a full Halloween party table with my Fudgy Halloween Spiderweb Brownies for another chocolatey Halloween treat
- Add a sweet and salty snack like my Easy Halloween Pretzel Rods
- Balance the sweets with a savory bite like my Easy Mummy Hot Dogs
- Serve with cold milk or a spooky punch
Storing Monster Cupcakes
- Store in an airtight container at room temperature for 2 to 3 days
- If your kitchen is warm, keep them in the fridge and let them come to room temperature before serving
- Bake the cupcakes 1 to 2 days ahead, then add the buttercream and eyes on the day you serve them
- Skip the sugar eyes for very young children, since they are small and hard
If you like this recipe Explore more recipes
FAQs
Can I make these Halloween cupcakes ahead of time?
Yes, absolutely! If you want to get ahead of the game, you can bake the chocolate cupcakes 1 to 2 days in advance. Just store them at room temperature in an airtight container. I would recommend doing the buttercream and sticking the edible eyes on the day you serve them, just so the candy eyes do not go soft or bleed their colors.
Why did my cupcakes sink in the middle?
It happens to the best of us! Sinking usually happens if you over mix the batter once the flour goes in, because it lets too much air in. It can also happen if you are peeking and open the oven door too early while they are baking. Keep that oven door shut until they are nearly done, and just mix your flour and cocoa in until they are just combined.
Do these Halloween cupcakes need to be kept in the fridge?
Because we are just using a standard buttercream made with baking margarine and icing sugar, they are absolutely fine sitting out at room temperature in an airtight container for 2 to 3 days! There is no cream cheese or heavy cream in this icing, so no need to take up space in the fridge. If your kitchen is very warm, pop them in the fridge and bring them back to room temperature before serving.
Can I make these gluten free or dairy free?
Yes. For gluten free, swap in a self raising gluten free flour blend. For dairy free, use a baking margarine that does not contain milk. Gluten free flours can behave a little differently from brand to brand, so the texture may vary. Check the labels on your cocoa, icing sugar, margarine, and especially the sugar eyes if you are baking for someone with allergies.
Can I use butter instead of margarine?
Yes, you can use the same weight of softened butter for both the cake and the buttercream. Keep in mind that butter is not dairy free, so stick with a dairy free baking margarine if that matters for your guests.
Can I use a cake mix for these monster cupcakes?
This recipe is made from scratch, but you can absolutely use a chocolate cake mix, prepared and baked according to the package directions, and then follow the same butterfly cake method with the buttercream and eyes. Just let the cupcakes cool completely before you cut and decorate.
Can kids help make these monster cupcakes?
Yes, kids will love mixing, spooning the batter into the liners, piping, and sticking on the eyes. An adult should handle the oven and the sharp knife, and everyone should skip tasting the raw batter since it has raw egg. Leave the sugar eyes off for toddlers, since they are small and hard.
How many eyes should I put on each monster?
As many as you like! One, two, or three eyes all look great, and mixing them up on a platter makes each monster look different. Press them gently into the buttercream so they stay put.
Easy Halloween Monster Chocolate Cupcakes
Course: DessertCuisine: BritishDifficulty: Easy12
cupcakes15
minutes20
minutes320
kcal30
minutes1
hour5
minutesA very basic, super fun chocolate cupcake recipe perfect for Halloween. Colorful buttercream monsters peek out of the top, decorated with edible eyes. Great to make with the kids.
Ingredients
- Equipment Needed:
12-hole cupcake tin
Cupcake liners
Stand mixer or hand mixer
Cooling rack
Piping bag
Small sharp knife
- Ingredients:
- For the Cupcakes:
170 g (6 oz) baking margarine
170 g (6 oz) granulated sugar or caster sugar
3 large eggs
125 g (4 1/2 oz) self-raising flour
42 g (1 1/2 oz) cocoa powder
- For the Buttercream (double for two colors):
170 g (6 oz) icing sugar
85 g (3 oz) baking margarine
1 tsp vanilla essence
Gel food coloring (green, blue, etc.)
- For Decorating:
Edible sugar eyes
Directions
- Preheat your oven to 180°C (350°F), or 160°C for a fan oven. Line a 12-hole cupcake tin with cupcake liners.
- In a stand mixer, cream together 170g (6 oz) baking margarine and 170g (6 oz) sugar until pale and light in color. Scrape down the sides of the bowl.
- Crack the 3 eggs into a separate jug. Add half the eggs to the creamed mixture along with a spoonful of the flour to prevent curdling, and mix well.
- Add the remaining eggs, the 125g (4 1/2 oz) self-raising flour, and the 42g (1 1/2 oz) cocoa powder. Mix until just combined. Do not taste the raw batter.
- Spoon the mixture evenly into the cupcake liners.
- Bake for 15 to 20 minutes, until a toothpick in the center comes out clean or with a few moist crumbs. Keep a close eye on them towards the end.
- Let the cupcakes cool in the tin for a few minutes, then transfer to a wire cooling rack until completely cool.
- While they cool, make the buttercream: beat together 170g (6 oz) icing sugar, 85g (3 oz) baking margarine, vanilla essence, and food coloring until fluffy. Transfer to a piping bag.
- Using a small knife angled slightly inward, cut a shallow circle out of the top of each cooled cupcake (adult job). Cut the removed piece of cake in half.
- Pipe a generous blob of buttercream into the center of the cake.
- Place the two cake halves back on top, angled upward so the buttercream peeks through.
- Press edible eyes into the buttercream to create your monsters.
Notes
- Gluten-Free Swap: If you’ve got anybody that’s gluten-free, use a self-raising gluten-free flour blend in place of the regular flour. Texture can vary by brand. Check labels on cocoa, icing sugar, margarine, and sugar eyes.
- Dairy-Free Swap: Use a baking margarine that does not contain milk. Check the sugar eyes and other ingredients for dairy too.
- US Substitutions: Self rising flour = 1 cup (about 125g) all purpose flour plus 1 1/2 tsp baking powder plus 1/4 tsp salt. Icing sugar = powdered sugar. Caster sugar = superfine sugar. Vanilla essence = vanilla extract.
- Piping Tip: If you struggle to fill a piping bag, stand it up inside a tall glass or mug and fold the edges over the rim. It holds it steady for you.
- Storage: Airtight container at room temperature for 2 to 3 days. Refrigerate if your kitchen is warm.
- Safety: The batter contains raw egg, so do not taste it. Sugar eyes are a choking hazard for young children. An adult should handle the oven and the knife.
- Allergen Note: Contains wheat (gluten), egg, and possibly milk depending on the margarine. Sugar eyes and food coloring vary by brand.