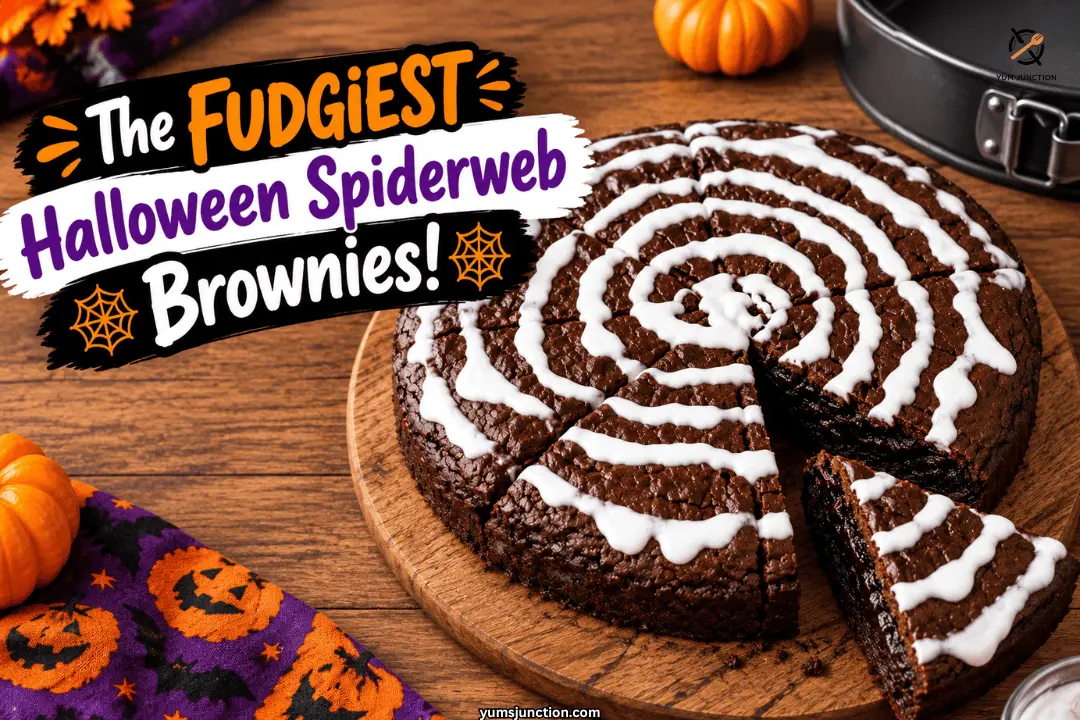
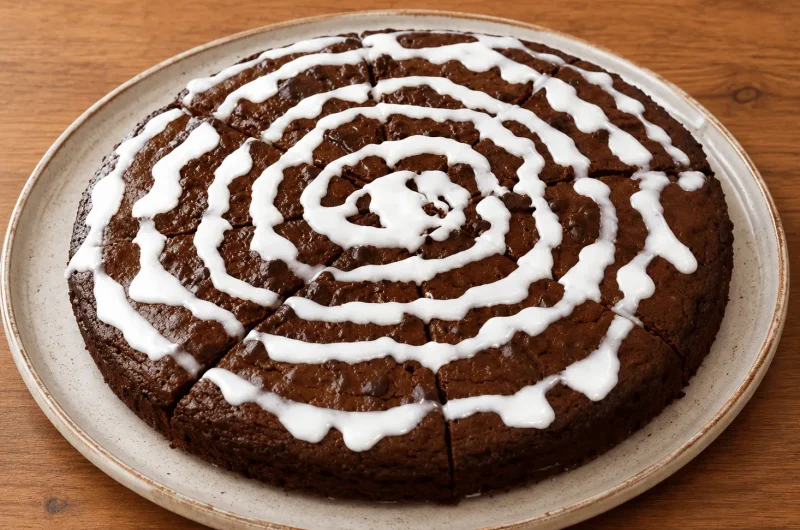
These Halloween spiderweb brownies are super fudgy chocolate brownies baked in a springform pan for a clean, round shape, then decorated with a piped white frosting spiderweb design. A secret pinch of ground coffee deepens the chocolate flavor without tasting like coffee at all. Total time is about 1 hour 25 minutes, most of it hands-off baking and cooling.
I am going to tell you how to make a brownie recipe that has been spun just for Halloween. It is fun, easy, delicious, and I just cannot begin to tell you how good these Halloween brownies are. So, let us get it going.
Table of Contents
Why You Will Love This Spiderweb Brownies Recipe
This is really an easy recipe, and it is the type of treat you should take to work someday because the people you work with are going to be like, “Wow, we love you, these are so good, please bring more.” We are not reinventing the wheel here, but we are bringing incredible depth of flavor with a little brown sugar, natural honey, and a secret pinch of ground coffee that makes the chocolate taste more like chocolate. Plus, they look just like a spooky spiderweb for Halloween. What is not to love?
If you’re building out a full Halloween treat table, my Ghoulish Monster Eye Cookies are another fun, spooky bake that’s just as easy to decorate.
What You Will Need
Special Equipment
- 9 inch springform pan
- Parchment paper
- Double boiler (or a heat proof glass bowl set over a saucepan of simmering water)
- Ziploc bag (for piping frosting)
- Toothpicks (for testing doneness)
The Ingredients
- 1 stick (4 oz) unsalted butter (plus extra for greasing the pan)
- 8 oz high quality chocolate (a blend of bittersweet and milk chocolate)
- 1 cup delicious brown sugar (light or dark)
- 3 large eggs
- 1 and 1/2 tbsp honey
- 1 tsp ground coffee (or espresso powder)
- 1 tsp vanilla extract
- 3/4 cup all purpose flour
- 1/4 tsp salt
- White frosting (store bought or homemade, for the spiderweb lines)
Let Us Get Baking
1. Gearing Up for Brownie Bliss
First, you are going to take a 9 inch springform pan, which just means that the bottom comes out once you are done cooking. That is what that little latch on the side is for. They are really efficient, awesome, and cheap, so you guys should definitely pick one up.
Preheat your oven to 350°F. You are going to trace a circle on some parchment paper to line the bottom. This is going to make it super easy for you to get the brownies out after you cook them. Lightly butter the sides and bottom of the pan, place the parchment paper circle inside, and butter the top of the parchment. You could just spray the pan, but parchment makes it extra sure it is going to come right off.
2. Melting Magic: Chocolate and Butter
Let’s get started making some brownies. You are going to do a double boiler here, which just means there is some water, really hot and steaming in the bottom pot, and you are going to melt chocolate and a full stick of butter in a bowl on top.
Because you are making really great brownies, you have to use really great chocolate. Use whatever blend you guys like, but I went with 8 ounces of a little bittersweet and some milk chocolate, which works really nice. Melt them together gently while stirring until you get a beautiful and glossy shine. Remove from heat.
My The Secret Brownies recipe uses a similar melt-first method if you want to compare notes on getting that perfect fudgy texture.
3. The Secret to Amazing Brownies
One of the absolute keys to making great brownies is mixing each ingredient one at a time. You might think that you can just throw it all in there, mix it up, and it is going to be the same thing at the end. Logic would tell you that, but it amazingly does not work like that. Follow the steps, incorporate the ingredients just like I do sequentially, and you will end up with great brownies, I promise.
4. Incorporate the Flavors
Whisk 1 cup of delicious brown sugar into the melted chocolate mixture to bring a little molasses and depth of flavor to the table. Next, mix in 1 teaspoon of ground coffee. You will not taste the coffee, it just boosts the chocolate. Then add 1 teaspoon of vanilla extract, and about a tablespoon and a half of delicious honey, which is a fantastic natural sweetener.
5. Add Eggs and Dry Ingredients
Whisk in the 3 large eggs one at a time, making sure each is fully incorporated before adding the next. Finally, gently fold in the 3/4 cup all purpose flour and 1/4 tsp salt until just combined. Do not overmix.
6. Pour and Tap
Once everything is mixed, scrape out all the batter into your prepared springform pan. Do not waste anything because this is all really good stuff. Give the pan a couple of taps on the counter to knock out any trapped air bubbles.
7. Bake
Bake it off at 350°F for 35 to 45 minutes. You are going to want to check it along the way with a toothpick. If it comes out covered in wet batter, it is not done. It should come out close to almost perfectly clear or clean with a few moist crumbs attached for that perfect fudgy texture.
8. Cooling and Slicing
Once it is cooked, cooling is important. You do not want to just yank it out right away. Let the brownies cool in the pan for at least a half an hour or longer. When it is cool, unlatch the springform pan and remove the outer ring. Cut the brownie circle into eight perfectly sized pieces. The trick is to halve it, give the pan a quarter turn, and keep halving all the way through.
9. Spiderweb Fun
To make the spiderweb, there is nothing like using a standard Ziploc bag. It is cheap, easy, and does the job perfectly. Put some white frosting in the bag and snip off a very small piece of the corner. Do a little test on a plate to see how it is coming out so you do not say whoops. Pipe white lines across the brownies to create your web. You could even put a little plastic toy spider character on top if you wanted to. Super fudgy on the inside and absolutely delicious. I promise you guys will love this.
What to Serve With This
- Pair these with a glass of cold milk for the classic combo
- Add them to a full Halloween dessert spread alongside my Easy Halloween Pretzel Rods for a mix of textures
- Serve slightly warm with a scoop of vanilla ice cream for a non-spooky twist any time of year
If you like this recipe Explore more recipes
FAQs
Why use a springform pan for brownies?
Springform pans are awesome and efficient. The latch on the side allows you to completely remove the outer ring once the brownies are baked. This means you do not have to dig into a square pan and ruin the first piece. You get a beautiful and round brownie cake that slices perfectly like a pie.
Can I taste the ground coffee in this recipe?
Not at all. Ground coffee or espresso powder is a fantastic baker secret. It does not make the brownies taste like a morning cup of joe. Instead, it brings out the depth of the cocoa, making the chocolate taste more like chocolate. The amount used here is a trace amount meant purely for flavor, not a meaningful source of caffeine, but if you are serving these to very caffeine-sensitive kids, it is fine to leave it out entirely.
How do I know when fudgy brownies are done baking?
Take a toothpick and poke it into the center. If it comes out coated in wet and runny batter, they need more time. For super fudgy brownies, you want the toothpick to come out almost perfectly clean, meaning there should be a few moist crumbs attached to it, but no raw liquid.
Why do I need to mix the ingredients one at a time?
It might seem logical to just throw everything in a bowl and mix it up, but it amazingly does not work like that. Incorporating ingredients sequentially, especially whisking the eggs in one at a time, builds the structure of the batter. This gives you that beautiful crackly top and perfectly fudgy center. Follow the steps, and I promise you will end up with great brownies.
Can I decorate these with a ghost, mummy, or eyeball design instead of a spiderweb?
Absolutely, this base brownie works great as a canvas for any Halloween design. For ghosts, pipe simple rounded ghost shapes in white frosting instead of web lines. For mummies, drizzle the white frosting back and forth in overlapping strips. For an eyeball look, add a few edible candy eyeballs on top of a dollop of white frosting.
Can I use white chocolate instead of frosting for the web?
Yes. Melt white chocolate chips gently in the microwave or over a double boiler, then use the same Ziploc bag piping method described in step 9. Melted white chocolate sets up firmer than frosting once it cools, so it holds a crisp web pattern nicely.
Can I add sprinkles to these Halloween brownies?
Definitely. Orange, purple, or black Halloween-themed sprinkles look great pressed lightly into the piped frosting web while it is still wet, or scattered around the edges of each slice for extra festive flair.
Are these easy enough for kids to help decorate?
Yes, the piping step is a great hands-on activity for kids once the brownies have cooled and the frosting is ready to go. The melting and baking steps involve hot equipment and should be handled by an adult, but decorating the web is genuinely kid-friendly and forgiving, since a wobbly web still looks spooky and fun.
Fudgy Halloween Spiderweb Brownies
Course: DessertCuisine: AmericanDifficulty: Easy8
Slices15
minutes40
minutes300
kcal30
minutes1
hour25
minutesSuper fudgy, incredibly rich chocolate brownies baked in a springform pan and decorated with a spooky frosting spiderweb. Fun, easy, and dangerously delicious.
Ingredients
- Equipment Needed:
9-inch springform pan
Parchment paper
Double boiler
Ziploc bag
- Ingredients:
1 stick (113g) unsalted butter, plus extra for greasing
8 oz (226g) high-quality chocolate, mix of bittersweet and milk chocolate
1 cup (200g) brown sugar
3 large eggs, room temperature
1 1/2 tbsp (32g) honey
1 tsp (2g) ground coffee, or espresso powder
1 tsp (5g) vanilla extract
3/4 cup (95g) all-purpose flour
1/4 tsp (1.5g) salt
1/4 cup (60g) white frosting, for piping
Directions
- Preheat oven to 350°F (175°C). Trace and cut a parchment paper circle to fit the bottom of a 9-inch springform pan. Grease the pan with butter, insert the parchment, and grease the top of the parchment.
- Set up a double boiler over simmering water. Melt the butter and chocolate together until completely smooth and glossy. Remove from heat.
- Whisk the brown sugar into the warm chocolate mixture. Add the honey, ground coffee, and vanilla extract, mixing thoroughly.
- Whisk in the eggs one at a time, ensuring each is fully incorporated before adding the next.
- Gently fold in the flour and salt until just combined.
- Pour the batter into the prepared pan, scraping the bowl clean. Tap the pan on the counter a couple of times to remove air bubbles.
- Bake for 35 to 45 minutes. A toothpick inserted in the center should come out with moist crumbs, almost clean but not completely wet.
- Allow the brownies to cool in the pan for at least 30 minutes before unlatching the springform ring.
- Slice the brownie into 8 equal wedges, halve, quarter turn, halve again.
- Place white frosting in a Ziploc bag, snip a tiny corner off, and pipe a spiderweb design over the top.
Notes
- Sequential Mixing: One of the keys to making great brownies is mixing each ingredient in order. Don’t just dump everything in a bowl at once. Take your time and incorporate them step-by-step.
- The Coffee Secret: You won’t taste the ground coffee. It is a baker’s secret to making chocolate taste more like chocolate. The amount used is trace and not a meaningful caffeine source.
- Cooling is Crucial: These are super fudgy brownies. If you pull them out of the pan too early, they might fall apart. Give them at least half an hour to set up.
- Piping Tip: Start with a tiny cut on your Ziploc bag. Do a test squeeze on a plate so you don’t accidentally ooze a massive blob of frosting onto your perfect brownies.
- Allergen Note: Contains gluten, dairy, and eggs. Chocolate may contain soy or tree nuts depending on brand, check your packaging if serving to a group with allergies.