
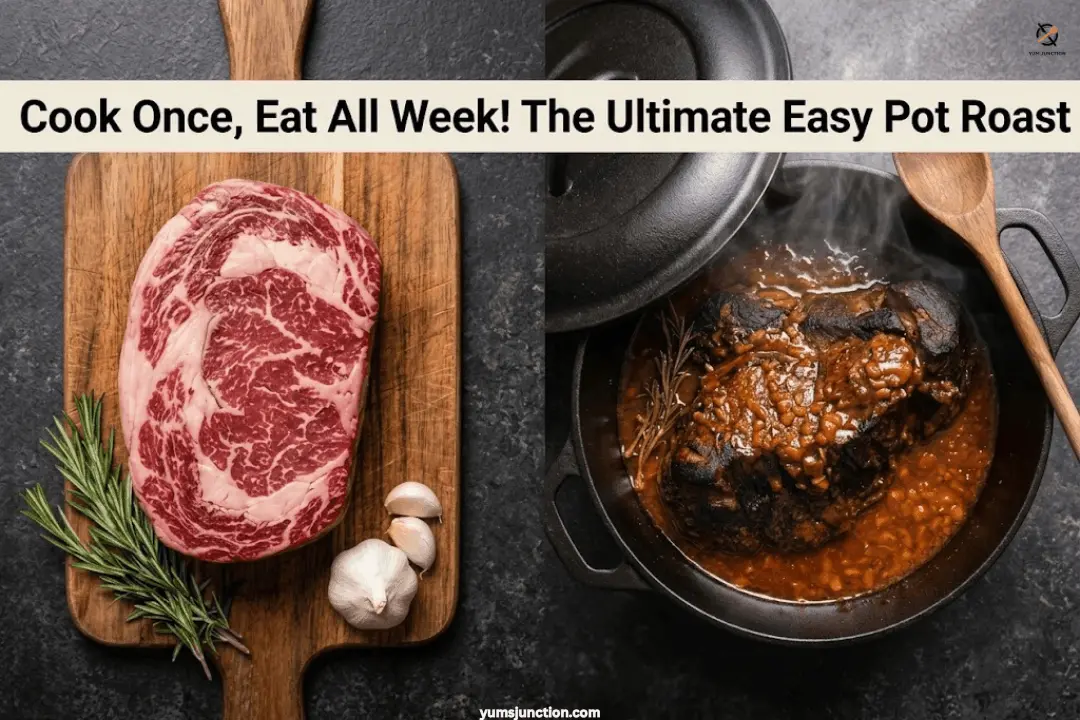
Pot roast is a classic American braised beef dinner where a well-marbled chuck roast is seared on all sides to build a dark crust, then slow-cooked in a covered Dutch oven at 300°F with beef stock, onion, garlic, tomato paste, and rosemary for four hours until the meat is fork-tender and the pan juices thicken into a rich, built-in gravy.
Are you looking for a simple recipe that can give you meals through the whole week? You found it with this easy pot roast. With just a little bit of time in the kitchen, you can make a melt-in-your-mouth dinner that transforms into super helpful and delicious meals for days. Let us put that Dutch oven to work for you!
Table of Contents
Why You Will Love This Pot Roast Recipe
You are going to love this recipe because it is practically hands-off once it hits the oven, but it delivers maximum comfort. We are taking a beautiful English chuck roast and building layers of deep and savory flavor by getting a proper sear and scraping up all those wonderful brown bits from the bottom of the pan. It does not ask you to get too fussy with the knife work, and the resulting meat is incredibly tender with a rich, built-in pot roast gravy. Plus, it is the absolute ultimate meal prep hack!
If you love big, comforting beef dinners like this one, also bookmark our Unstuffed Cabbage Soup with Meatballs, another slow-cooked, deeply savory beef dish that is perfect for cold evenings and works brilliantly as a way to stretch your leftovers through the week.
What You Will Need
Special Equipment
- Heavy-bottomed cast iron Dutch oven with a tight-fitting lid
- Tongs
- Cutting board and chef knife
The Ingredients
- 1 (3 to 4 lb / 1.3 to 1.8 kg) English roast or chuck roast, well marbled
- Kosher salt and fresh cracked black pepper, to taste
- 2 tbsp (30ml) vegetable oil or canola oil
- 1 large yellow onion, peeled and cut into ½-inch chunks
- 4 to 5 cloves garlic, smashed and roughly chopped
- 2 tbsp (16g) all-purpose flour
- 1 tbsp (15g) tomato paste
- 1 tbsp (15ml) Worcestershire sauce
- 2 cups (475ml) beef stock
- 2 to 3 sprigs fresh rosemary
Let’s Get Cooking
1. First Up: Prep and Sear That Beef!
We are starting with a beautiful English chuck roast. This is a fantastic cut from the chuck that is absolutely perfect for braising. Start by seasoning it up. Use kosher salt and fresh cracked pepper to make sure the top, the bottom, and the sides are nicely seasoned.
Preheat your oven to 300°F (150°C). Next, heat up your Dutch oven to medium-high and add a little vegetable or canola oil. Drop the whole roast in to sear. Let it get a really browned crust because that is what is going to really build the flavor. After browning both of the large sides for about 4 to 5 minutes, use tongs to turn the roast on its edges to get it completely seared on the sides too. Do not skimp on the chance to build flavor!
2. Time for Some Quick Veggie Prep
Pull the seared beef from the pan and set it aside. Temporarily turn off the heat for a minute while you get some ingredients ready. Peel the skin off your onion and from those halves, coarse chop it into about half-inch chunks. Do not get too fussy with it. Grab your cloves of garlic, smash them to pull the paper off the outside, and then go ahead and chop those up. It does not have to be too fine.
3. Building the Flavor Base
Get the Dutch oven back up to medium heat. Add those chopped onions and garlic. Just when those onions get softened from the heat, sprinkle a little all-purpose flour into the mixture along with the tomato paste. Stir constantly for about 1 minute to cook the raw flour taste out.
4. Deglaze the Pan
Pour in a splash of Worcestershire sauce and your beef stock. Work that liquid around with a wooden spoon and aggressively scrape the bottom of the pan. This releases all those wonderful brown bits (the fond) from the searing of the beef right into the liquid! This is where your pot roast gravy gets its incredible depth of flavor.
5. Into the Oven for the First Braise
At this point, return the roast to the Dutch oven. Cover tightly with the lid and head into the oven at 300°F (150°C) for 3 hours.
6. The Secret Flip
After 3 hours, carefully remove the pot from the oven and flip the roast over. This allows the top part that was not sitting directly in the braising liquid to have time submerged so it gets really tender. Drop in some fresh rosemary sprigs while it finishes cooking to get those nice herbal aromatics involved. Cover the pot and return it to the oven for just 1 more hour.
7. The Grand Reveal and Serve!
It smells amazing in here! Pull it out of the oven and see how you did. Go ahead and skim off any excess fat from the top of the pan liquid. Slice or pull apart the fork-tender roast, and then pour some of that rich and thickened pan sauce right over this beautiful pot roast. Just look how tender that is! Serve generously and enjoy your weekly meal prep!
This pot roast is absolutely incredible served alongside crispy potatoes. Our Beef Tallow Potatoes are the perfect side dish and actually taste even better when cooked in the drippings from this very recipe.
If you like this recipe Explore more recipes
Recipe FAQs
What is the best cut of meat for pot roast?
You want a cut with plenty of marbling, which is why an English roast or a classic chuck roast is the undisputed king of the pot roast! These cuts come from the shoulder of the cow. During a long and slow cook, the tough connective tissues melt down, making the beef incredibly juicy and fork-tender. Do not get lean cuts like eye of round because they will just dry out!
Do I really need to sear the beef first?
Yes! Do not skimp on the chance to build flavor! Searing does not lock in juices, but it creates a deep, rich, caramelized crust on the outside of the meat. When you add your beef stock later and scrape up those wonderful brown bits from the bottom of the pan, you are creating the flavor base for your entire pot roast gravy.
Why is my pot roast tough?
If you pull your roast out and it feels rubbery or resists a fork, the most common reason is simply that it is undercooked. Tough cuts like chuck need time for the collagen to break down. If it is tough after 3 hours, flip it, make sure there is liquid in the pan, and give it that extra hour in the oven!
How does the pot roast gravy get thick?
We build the gravy right into the cooking process! By adding a little bit of flour and tomato paste to the softened onions and garlic before we add the beef stock, we create a thickening base. As the roast cooks for 4 hours, that mixture naturally thickens the pan juices into a luscious and rich gravy. All you have to do at the end is skim off the excess fat!
What are the best pot roast side dishes?
So many delicious options! Mashed potatoes are the classic pairing since they soak up that incredible pan gravy. Roasted vegetables, egg noodles, or crusty bread to mop up the juices all work beautifully. Our Roasted Root Vegetables go in the oven at a similar temperature and are a natural companion to this recipe for a full Sunday dinner spread.
What can I do with pot roast leftovers?
This is where the meal prep magic really shines! Leftover pot roast shreds beautifully for sandwiches, tacos, rice bowls, fried rice, or a quick beef and vegetable soup the next day. Store leftover roast and juices together in an airtight container in the fridge for up to 4 days. The flavor gets even better the next day!

Easy Dutch Oven Pot Roast Recipe (Chuck Roast with Built-In Gravy)
Course: MainCuisine: AmericanDifficulty: Easy8
servings15
minutes4
hours450
kcal4
hours15
minutesA beautifully seared, melt-in-your-mouth English chuck roast braised in a rich garlic, tomato, and rosemary beef stock. The perfect Sunday dinner that doubles as easy weekly meal prep!
Ingredients
- Equipment Needed:
Cast iron Dutch oven with tight-fitting lid
Tongs
Chef knife and cutting board
- Ingredients:
1 (3 to 4 lb / 1.3 to 1.8 kg) English roast or boneless chuck roast, well marbled
Kosher salt, to taste
Fresh cracked black pepper, to taste
2 tbsp (30ml) vegetable or canola oil
1 large yellow onion, cut into ½-inch chunks
4 to 5 cloves garlic, roughly chopped
2 tbsp (16g) all-purpose flour
1 tbsp (15g) tomato paste
1 tbsp (15ml) Worcestershire sauce
2 cups (475ml) beef stock
2 to 3 sprigs fresh rosemary
Directions
- Preheat oven to 300°F (150°C). Season the entire roast generously with kosher salt and cracked black pepper on all sides.
- Heat oil in a Dutch oven over medium-high heat. Sear the roast on all sides, including the edges, until a dark, rich crust forms (about 4 to 5 minutes per large side). Remove the beef and set aside.
- Lower heat to medium. Add the chopped onion and garlic, cooking until just softened.
- Stir in the flour and tomato paste. Cook for 1 minute, stirring constantly, to form a flavor base.
- Pour in the Worcestershire sauce and beef stock. Scrape the bottom of the pot aggressively to release all the browned bits (the fond) into the liquid.
- Return the roast to the pot. Cover tightly and bake at 300°F for 3 hours.
- Remove from the oven and flip the roast over. Add the fresh rosemary sprigs. Cover and bake for 1 additional hour until perfectly fork-tender.
- Skim excess fat from the surface of the gravy, pour over the meat, and serve immediately.
Notes
- Storage: Store leftover roast and juices together in an airtight container in the fridge for up to 4 days. The flavor actually gets better the next day!
- Swaps: If you cannot find an English roast, a standard boneless beef chuck roast, shoulder roast, or arm roast will all work beautifully.
- The Sear Matters: Do not rush the searing step. Getting that dark crust on the meat and scraping those browned bits off the bottom of the pan is what creates the rich, deep flavor for your gravy.
- The Flip is Crucial: Flipping the meat at the 3-hour mark ensures the part of the roast that was exposed to the dry oven air gets a chance to bathe in the braising liquid, making the whole cut uniformly tender.
- Food Safety: Beef roasts should reach an internal temperature of at least 145°F (63°C) with a 3-minute rest per USDA guidelines for whole cuts. For this braised recipe, 4 hours at 300°F will comfortably exceed that temperature, but always verify with a meat thermometer if unsure.