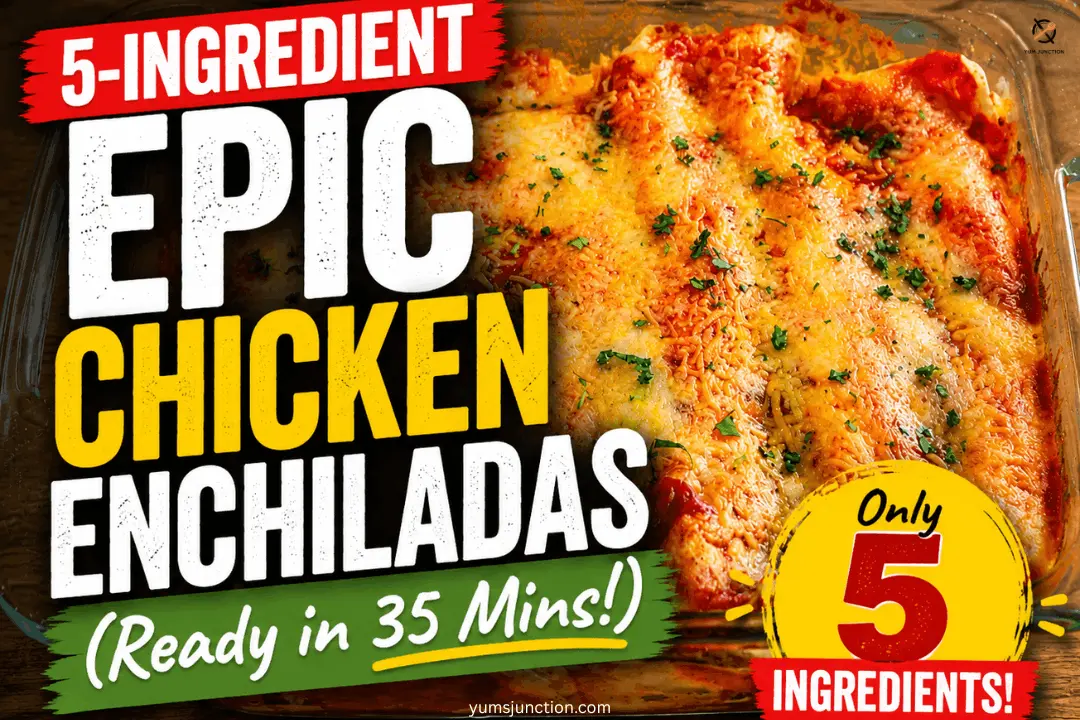
Let’s make some epic chicken enchiladas. And the best part? They only take five ingredients and are super quick to throw together!
Hey, welcome to YumsJunction! I share lots of lunch ideas and family-friendly recipes that we love to eat at my house.
This recipe for enchiladas is a total lifesaver. We are starting out with rotisserie chicken, which means there is absolutely no cooking required for the meat. It saves you a ton of time, and you’re ready to assemble right away! I usually finely shred my chicken in less than 60 seconds.
Love a good rotisserie chicken hack? If you have extra shredded chicken left over, you should absolutely try these 3 Quick & Easy Rotisserie Chicken Wraps (Perfect for Lunch!)!
Table of Contents
Why You’ll Love This
You are going to be obsessed with this recipe because it is the ultimate “busy mom” dinner hack. With just 5 simple store-bought ingredients, you get all that rich, cheesy, homemade flavor without standing over a hot stove all evening.
Plus, the filling isn’t overly saucy, meaning your enchiladas won’t get soggy; they stay perfectly warm, nicely filled, and easy to cut right through. It takes about five minutes to assemble, and you can even prep it entirely the night before!
Love effortless comfort food? If you need a fast side dish, you have to try this easy crispy bacon fried cabbage.
What You’ll Need
Special Equipment
- 9×13-inch baking dish
- Large mixing bowl
- Tongs
- Spatula (for serving)
The Ingredients
- 3 to 4 cups rotisserie chicken, finely shredded
- 1 (10 oz) can Rotel (diced tomatoes and green chilies), undrained
- 2 (10 oz) cans enchilada sauce (mild or spicy, depending on preference)
- 2 cups shredded cheese (Mexican blend or cheddar), divided
- 6 large burrito-size flour tortillas (or 8–10 smaller tortillas)
- Fresh cilantro, chopped (for garnish)
Let’s Get Cooking!
1. Preheat the Oven
Preheat your oven to 375°F (190°C). This temperature and the later bake time are right in line with many baked chicken enchilada recipes, which usually bake at 350–375°F until hot and bubbly.
2. Mix Up the Cheesy Chicken Filling
First things first, you are going to take your can of Rotel and add it straight to your shredded chicken in a large mixing bowl. Also add one whole can of enchilada sauce. My family likes mild enchilada sauce, so that’s what I always use, but if you like yours spicy, definitely grab the spicy version!
Now, this alone is going to make the enchiladas taste really good, but I want you to be able to cut right through cheesy chicken enchiladas. So, take half of your shredded cheese (about 1 cup) and add it right to the filling bowl. Then, with a big spoon, just mix everything around to incorporate the chicken, cheese, tomatoes, chilies, and sauce.
Pro Tip: This mixture takes like five minutes to make. Sometimes I make it the night before, put a lid on it, and refrigerate it. For tomorrow’s dinner, I just have to assemble and bake! Storing a cooked chicken filling in the fridge overnight is safe as long as it is kept chilled and used within 3–4 days.
3. Prep the Baking Dish
Grab your second can of enchilada sauce and pour about a third of it right into the bottom of your 9×13-inch baking dish. Use the back of a spoon to spread it into a nice even layer at the bottom. Save the rest of this can to pour over the top later.
Lightly coating the bottom of the dish with sauce is standard practice so the tortillas do not stick and the bottoms stay moist but not soggy.
4. Build the Enchiladas
Now it’s time to build! I like to use large burrito-size tortillas, but you can also use smaller ones for tacos or fajitas, basically, whatever fits nicely into your baking dish.
Place a tortilla on your board, grab some of the chicken mixture with tongs, and place it right in the middle. You want to make sure these are well-filled! I put about 3/4 of a cup of shredded chicken in there. One per person is usually plenty.
For enchiladas, you don’t need to fold the sides in like a burrito. Just take the back end, tuck it tightly over the filling, and roll it up. Lift it up and place it seam-side down in your prepared baking dish. If your tortillas are a little larger than the pan and touch the edges, that’s completely okay.
It all gets baked and covered in cheese and sauce anyway! Repeat the process until your pan is full. Rolling them seam-side down and snugly fitting them in the dish is exactly how most baked enchilada recipes are assembled.
5. Sauce and Cheese
All right, so now that they’re all snug in the pan, it’s time for the finishing touches. Take that leftover 2/3 of your second can of sauce and pour it evenly over the top of the rolled tortillas. Use the back of your spoon to distribute it everywhere so they are perfectly coated. Finally, take the rest of your shredded cheese (the remaining 1 cup) and sprinkle it right over the top.
6. Bake
Into the oven they go for about 25 minutes or so. When you see the sauce bubbling beautifully around the edges and the cheese is completely melted, they are ready to come out!
7. Garnish and Serve
Remove from the oven and immediately top with fresh chopped cilantro. Run a spatula around the edges of the pan to loosen any stuck cheese, serve warm, and enjoy that cheesy chicken goodness!
If you like this recipe Explore more recipes
FAQs
Can I make these chicken enchiladas ahead of time?
Yes, absolutely! This is one of my favorite make-ahead hacks. You can either mix the filling up the night before and keep it in the fridge, or you can assemble the whole pan of enchiladas in advance. Just cover the dish, leave it in the fridge, and pop it in the oven when you’re ready. Add a couple of extra minutes to the bake time if you’re baking it straight from the cold fridge.
Do I have to use large burrito-size tortillas?
Not at all! I like the large ones because they’re super filling; you basically just need one per person. But if you have smaller taco or fajita-sized tortillas on hand, you can absolutely use those. Just use a little less filling per tortilla and pack as many as you can into your 9×13 baking dish!
How to prevent soggy tortillas in enchiladas?
The secret to non-soggy enchiladas is right here in this recipe! We purposely only use one can of sauce in the chicken filling, and save the second can for the bottom of the pan and the topping. This gives you all the flavor without soaking the inside of the tortilla, meaning they bake up perfectly and you can still cut right through them.
Can I make these spicy?
For sure! My family prefers things on the milder side, so I use mild enchilada sauce and standard Rotel. If you want to turn up the heat, just buy spicy enchilada sauce and swap the regular Rotel for a can of the hot version with habaneros or extra chilies.
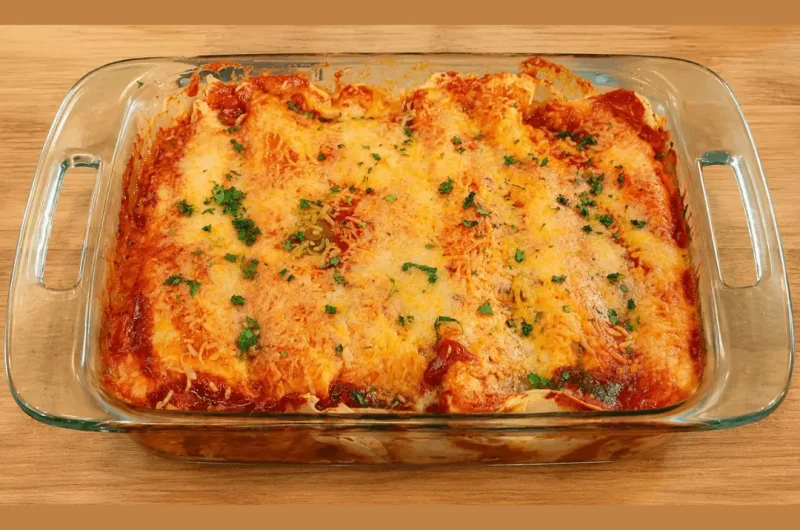
Easy Make-Ahead Chicken Enchiladas
Course: MainCuisine: Mexican-InspiredDifficulty: Easy6
servings10
minutes25
minutes450
kcal35
minutesLearn how to make the best chicken enchiladas that stay firm, not soggy! Perfect for meal prep and busy weeknights.
Ingredients
- Equipment Needed
9×13-inch baking dish
Large mixing bowl
Tongs
Spatula
- Full ingredients list
1 whole rotisserie chicken, shredded (approx. 3–4 cups / 400 g)
1 can (10 oz / 283 g) Rotel (diced tomatoes and green chilies)
2 cans (10 oz / 283 g each) mild enchilada sauce
2 cups (8 oz / 226 g) shredded cheese (Mexican blend or cheddar), divided
6 large burrito-size tortillas
1/4 cup (10 g) fresh cilantro, chopped (for garnish)
Directions
- Preheat your oven to 375°F (190°C).
- In a large mixing bowl, combine the shredded rotisserie chicken, the entire can of Rotel, 1 whole can of enchilada sauce, and 1 cup (half) of the shredded cheese. Mix well.
- Pour about 1/3 of the second can of enchilada sauce into the bottom of a 9×13-inch baking dish. Spread it evenly.
- Place a tortilla flat on a surface and add about 3/4 cup of the chicken mixture to the center. Tuck the edge over the filling and roll tightly.
- Place the rolled tortilla seam-side down in the baking dish. Repeat with the remaining tortillas.
- Pour the remaining 2/3 of the second can of enchilada sauce evenly over the top of the tortillas, using a spoon to spread it so the edges are coated.
- Sprinkle the remaining 1 cup of shredded cheese evenly over the top.
- Bake for 25 minutes until the sauce is bubbling and the cheese is melted.
- Garnish with chopped fresh cilantro, let sit for 5 minutes, and serve warm.
Notes
- Make-Ahead Tip: You can mix the chicken filling the night before; just put a lid on the bowl, pop it in the fridge, and assemble the enchiladas the next evening. You can also assemble the entire tray ahead of time, cover it in foil, write the oven temp on top, and have a family member pop it in the oven before you get home from work.
- Soggy Tortilla Avoidance: This filling specifically uses just one can of sauce on the inside so the tortillas stay intact and don’t turn into mush. You will still be able to easily cut through them.
- Tortilla Swaps: I use large burrito-sized tortillas here so one equals a full meal. If you prefer smaller tacos or fajita-sized tortillas, just fill them with slightly less mixture and fit as many as you can into your 9×13 pan.
- Spice Level: My family loves mild enchilada sauce, but if your family likes a kick, simply swap it out for a spicy enchilada sauce and use the “Hot” version of Rotel.