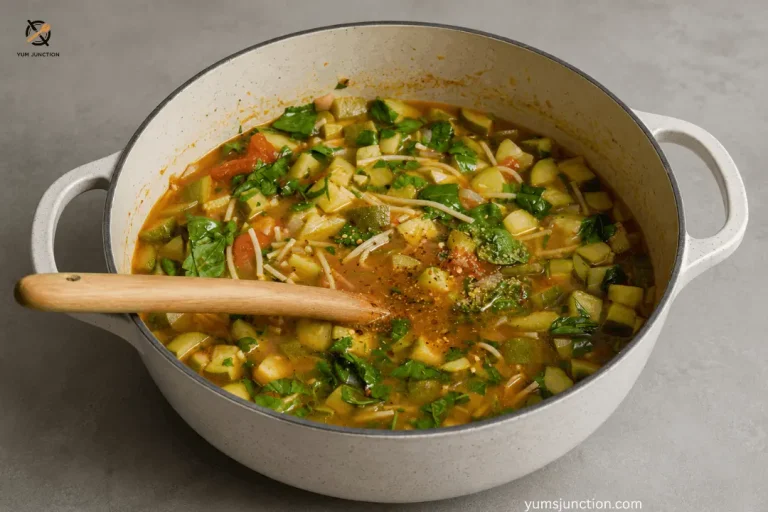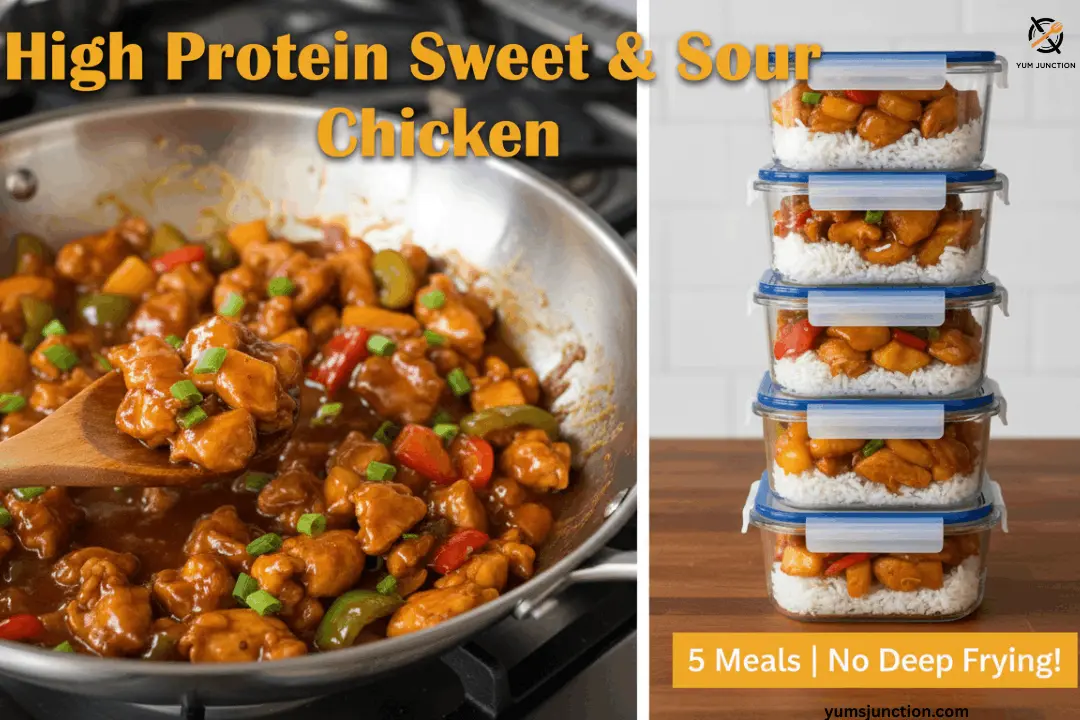
In this post, I will be telling you guys about meal prep—I am talking about sweet and sour chicken! This is literally a high-protein dish, and it tastes absolutely incredible. Seriously, you gotta try it. It’s super easy to make, it’s quite cheap, and it will last you the week—or the weeks ahead depending on how you store it.
If you’re on a big meal prep kick right now, you should also check out my Meal Prep With Me: 3 Easy Grab-and-Go Breakfasts (Sweet & Savory!) for easy high-protein breakfast ideas to pair with this.
Why You’ll Love This
Listen, if you love takeout but want to keep your macros in check, this is the recipe for you. You’ll love this because we’re completely ditching the deep fryer and refined sugars, but keeping all that massive, tangy flavor. By using lean chicken breast, a touch of honey, and loads of fresh veggies, we get a massive protein hit that actually tastes amazing. Plus, it portions perfectly into five meals, meaning your weekday lunches are sorted. No more sad desk lunches!
If you love having your healthy dinners sorted for the week, you’ll probably be obsessed with my 8 Vegan Freezer-Friendly Dinners for Easy Meal Prep too—they’re perfect to stash in the freezer next to this sweet and sour chicken.
What You’ll Need
Special Equipment:
- Fine microplane or grater
- Large pan or heavy-bottomed pot
- 5 Meal prep containers (vacuum-pump style recommended for longevity)
For the Rice Base:
- 300g Basmati rice, washed
- 600ml Cold water
- Sea salt flakes, to taste
For the Chicken & Veggies:
- 1.4 kg (3 lbs) Chicken breast, diced into even chunks
- 3 Bell peppers (capsicums), seeded and diced into large chunks
- 1 Brown or yellow onion, halved and sliced into thin half-moons
- 30ml + 20ml Grapeseed oil (or neutral oil of choice, divided)
- Sea salt flakes, to taste
For the Aromatics:
- 4 cloves Garlic, microplaned into a paste
- 15g Fresh ginger, microplaned into a paste
For the Sweet & Sour Sauce:
- 125ml Light (low-sodium) soy sauce
- 80ml Store-bought pineapple juice (Do not use fresh!)
- 80g Honey
- 40ml Worcestershire sauce
- 40ml Apple cider vinegar (or white vinegar)
- 40ml Tomato sauce (ketchup)
- 12g Cornflour (cornstarch)
For Garnish (Optional):
- Sesame seeds (approx. 1 tbsp)
- Fresh spring onions (scallions), sliced
- Fresh chili, sliced
Let’s Get Cooking!
1. Getting Our Rice On
Starting out, you gonna get your rice on. If you don’t want rice you can totally change it up, but you gonna go with 300 grams of washed Basmati rice, 600 milliliters of cold water, and a bit of sea salt flakes to taste in a pot.
Give it a stir to break up any clumps, bring it to a boil, pop on a lid, reduce the heat to low, and then just let this simmer away for 14 minutes undisturbed. Once that’s done, turn off the heat but leave the lid on for a final four minutes. Remove the lid, fluff it up with a fork to break up the grains, and set it aside.
2. Prepping Those Colorful Veggies
The prep for the sweet and sour chicken is really simple. You’re going to need three bell peppers (or capsicums for my Australian friends!). Slice them in half, pick out the seeds and pith with your fingers, and give them a bang on the bench to remove any excess seeds. Dice them into large chunks.
Next, grab one medium brown or yellow onion. Slice off both ends, cut it in half, peel it, and slice it the whole way across into nice half-moons. Throw the onion and bell peppers into a bowl and mix them up with your hands.
3. Aromatics & Our Protein Pick
Moving on, we’re going to need four cloves of garlic and 15 grams of ginger. Run both of these along a fine microplane to create a paste.
As for the protein, I personally went for chicken breast because it was a lot cheaper at the time! (You can definitely use chicken thigh if you prefer). Use 1.4 kilos of big breasts. Slice these into strips, rotate them 90 degrees, and dice into large, even-sized pieces so they all cook at the exact same time.
4. Whipping Up the Sweet & Sour Sauce
In a mixing bowl, we’re going to combine:
- 125ml light or low-sodium soy sauce for that nice umami flavor.
- 80ml store-bought pineapple juice. Pro tip: Don’t use fresh for this recipe! The enzymes in the fresh pineapple will break down the cornflour and won’t allow it to thicken.
- 80g honey for sweetness (a lot of recipes use sugar, but we are keeping it better for you).
- 40ml Worcestershire sauce for depth of flavor.
- 40ml apple cider vinegar to bump up the acidity.
- 40ml tomato sauce (ketchup) to add a nice tangy, subtle sweetness.
- 12g cornflour (cornstarch) as our thickening agent.
Whisk it all together until the cornflour breaks down and those flavors become friends. Pop it aside!
5. Time to Cook: Sautéing
Place a large pan or heavy-bottomed pot over high heat. Add in 30 milliliters of grapeseed oil (or any neutral-flavored oil), toss in the onions and bell peppers, and add a sprinkle of sea salt flakes. Sauté this for about four minutes until you get some nice color and the onions start to caramelize. Remove the veggies and transfer them to a plate.
6. Searing the Chicken
Place the same pan back over high heat and add another 20 milliliters of grapeseed oil. When it’s nice and hot, add the chicken in an even layer and a pinch of sea salt. Spread it out so it’s not sitting on top of itself (do it in batches if your pan is too small!). Sear undisturbed for three minutes to get a nice brown color, give it a good mix, and cook for another three minutes.
Crucial Tip: If you get a little bit of water pooling in the bottom of the pan, drain it off immediately! Otherwise, the chicken will steam and become like rubber.
7. Making the Flavors Become Friends
After six minutes total on the chicken, add your garlic and ginger paste. Mix it around for 45 seconds to get that amazing infusion going. Next, add the sautéed veggies back in and mix for another 30 to 40 seconds so the flavors become friends.
8. Thicken the Sauce
Give your sweet and sour sauce a quick whisk (the cornflour loves to sit at the bottom), pour it into the pan, and bring it to a boil. Cook for two minutes, stirring continuously. The cornflour will react, thickening up beautifully and coating everything in that glossy, delicious sauce. Lastly, throw in a tablespoon of sesame seeds and mix well. Turn off the heat!
9. Portioning and Storing
If you want to make your life easier, just portion everything equally into five containers over your fluffy basmati rice. Garnish with some fresh spring onion (scallion), chili, or extra sesame seeds.
These will last up to four days in the fridge and four months in the freezer. If you use vacuum-pump meal prep containers to extract the air, they’ll even last an extra day in the fridge!
Once your high-protein lunches are done, you can keep your week super simple by making my The One-Pan Meal That Saves My Healthy Eating During the Week—it’s another easy one-pan healthy dinner that reheats like a dream.
If you like this recipe Explore more recipes
FAQs
Is healthy sweet and sour chicken high in protein?
Yes, absolutely! With a whopping 1.4 kilos of lean chicken breast as our main ingredient, this dish provides a massive protein hit. Because we skip the heavy deep-frying batter, you’re getting pure, muscle-building protein that will keep you full all day.
Can I use fresh pineapple juice instead of store-bought?
I highly recommend sticking to store-bought pineapple juice for this. Fresh pineapple contains an enzyme called bromelain, which will actually break down the cornflour and completely destroy its thickening power. Save the fresh pineapple for snacking and use the boxed stuff for the sauce!
How do you make Sweet and Sour Chicken healthier?
Traditional sweet and sour chicken relies heavily on deep-frying the chicken in batter and loading the sauce with cups of refined white sugar. We make this much healthier by simply pan-searing lean chicken breast, loading up on fresh bell peppers and onions, and using a modest amount of honey to get that perfect natural sweetness.
Is healthy sweet and sour chicken good for meal prep?
It is arguably one of the best! It reheats incredibly well, and the flavors actually intensify as they sit in the fridge. This recipe will last up to four days in the fridge and up to four months in the freezer. Plus, the macro breakdown is completely dialed in for your weekly goals.

High Protein Sweet and Sour Chicken Meal Prep
Course: MainCuisine: Chinese-AmericanDifficulty: Easy5
servings15
minutes15
minutes680
kcal30
minutesSkip the takeout! This healthy, high-protein sweet and sour chicken is packed with vibrant veggies, lean chicken breast, and a sticky, perfectly balanced sauce. Perfect for your weekly meal prep!
Ingredients
- Equipment Needed:
Fine microplane
Large pan or pot
5 Meal prep containers
- Ingredients:
300g Basmati rice (washed)
600ml Cold water
1.4 kg Chicken breast (diced)
3 Bell peppers / capsicums (diced)
1 Brown or yellow onion (sliced)
4 cloves Garlic (microplaned)
15g Fresh ginger (microplaned)
50ml Grapeseed oil (divided: 30ml + 20ml)
125ml Light soy sauce (low sodium)
80ml Store-bought pineapple juice
80g Honey
40ml Worcestershire sauce
40ml Apple cider vinegar (or white vinegar)
40ml Tomato sauce / ketchup
12g Cornflour / cornstarch
Sea salt flakes (to taste)
1 tbsp Sesame seeds
Spring onions / scallions (to garnish)
Fresh chili (to garnish)
Directions
- Combine washed rice, water, and a pinch of salt in a pot. Bring to a boil, cover, reduce heat to low, and simmer for 14 minutes. Turn off heat and let rest covered for 4 minutes. Fluff with a fork.
- In a bowl, whisk together soy sauce, pineapple juice, honey, Worcestershire sauce, apple cider vinegar, tomato sauce, and cornflour. Set aside.
- Heat 30ml grapeseed oil in a large pan over high heat. Add bell peppers, onions, and salt. Sauté for 4 minutes until lightly caramelized. Remove and set aside.
- Add remaining 20ml oil to the hot pan. Add chicken, season with salt, and sear undisturbed for 3 minutes. Stir and cook for another 3 minutes (drain any excess water from the pan to avoid steaming).
- Add garlic and ginger paste; cook for 45 seconds. Stir in the cooked veggies for another 30–40 seconds.
- Whisk the sauce mixture again and pour it into the pan. Bring to a boil and cook for 2 minutes until the sauce is thick and glossy.
- Remove from heat, stir in sesame seeds, and divide into 5 containers with the rice. Garnish with spring onions and chili.
Notes
- Storage: Lasts up to 4 days in the fridge and up to 4 months in the freezer in airtight containers. If using vacuum-sealed prep containers, you can get an extra day in the fridge!
- Swaps: You can absolutely swap the chicken breast for chicken thighs if you prefer. Just keep the diced pieces even! If you don’t have apple cider vinegar, white vinegar works perfectly.
- Pro Tip 1: Do not use fresh pineapple juice for the sauce! The natural enzymes in fresh pineapple will break down the cornflour and stop your sauce from getting nice and thick. Stick to store-bought juice.
- Pro Tip 2: Don’t crowd the chicken pan! If your pan is too small, cook the chicken in batches. If water pools in the bottom, drain it off immediately so your chicken sears rather than turning to rubber.