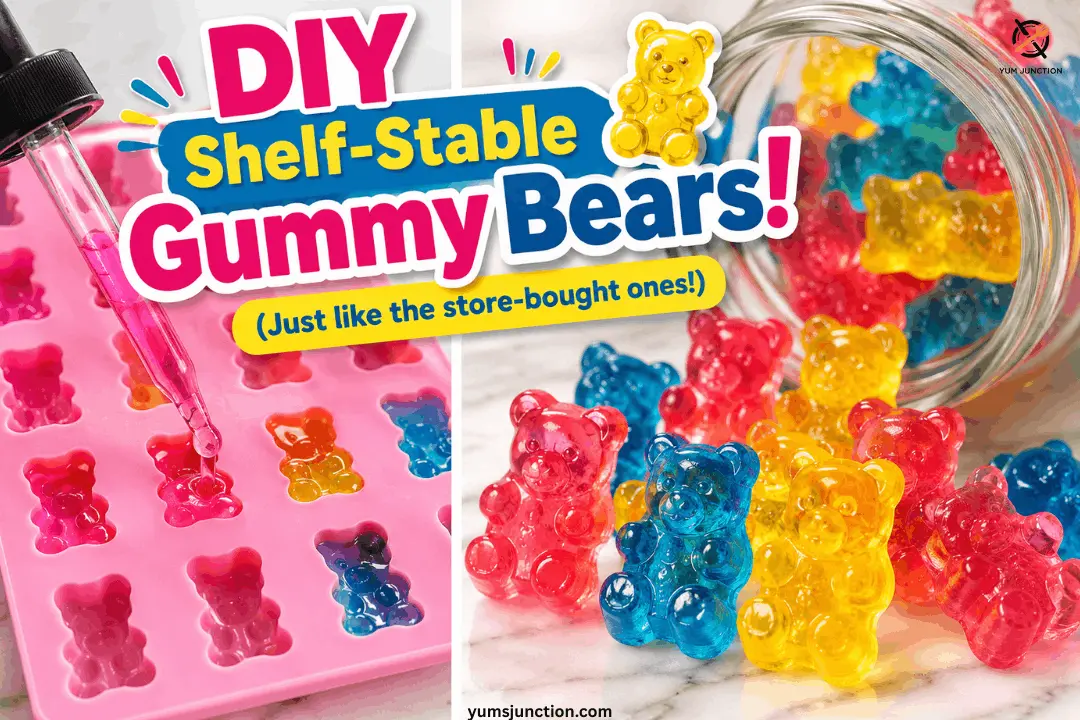
I’m gonna tell you how to make your very own homemade, authentic, shelf-stable gummy bears.
Why would you make your own gummy bears when you can buy them for one dollar at the grocery store? Because it’s FUN! Making them at home means you can completely customize the flavors, colors, and even make some grown-up versions.
Table of Contents
Why You’ll Love This
- They’re Actually Shelf-Stable: Unlike some recipes that melt the second they leave the fridge, these hold their shape perfectly on the countertop. As they age, they actually dry out and get that perfect, authentic gummy chew!
- Endless Flavor Combos: We are using concentrated candy oils, meaning you can make strawberry, raspberry, tropical punch, or whatever your heart desires.
- The “Pop” Factor: Popping these shiny, perfect little bears out of their molds is just incredibly satisfying.
If you love homemade gummy fun like this, also try my Delicious Mango & Chamoy Jellies! for spicy-sweet vibes!
What You’ll Need
Special Equipment
- Silicone gummy bear molds (with droppers/syringes)
- Small, clean pastry brush
- Fine mesh strainer
- Small food-safe paintbrush
- Heatproof mixing bowls
The Ingredients
- ½ cup Cold water (or flavored liquid like clear juice or wine)
- ¼ cup High-quality unflavored gelatin powder (high bloom strength, like Knox)
- ¾ cup Granulated sugar
- ¼ cup Corn syrup
- 1 tablespoon Sorbitol (essential for authentic texture!)
- ½ teaspoon Citric acid
- 1 to 1 ½ teaspoons Concentrated candy flavoring oils (e.g., raspberry, strawberry, tropical punch)
- Food coloring (gel or airbrush color preferred, e.g., electric pink, blue, yellow)
- Vegetable oil or cooking spray (for greasing molds)
Let’s Make Gummy Bears!
1. Bloom the Gelatin Base
First, you need to prepare your liquid base. Pour the cold water into a heatproof bowl. I personally like to use cold water because it gives me a blank canvas to add my own concentrated candy flavoring later. But you can totally use a flavored liquid like juice, sparkling cider, or even wine!
Sprinkle your gelatin mixture over the water and set it aside for 5-10 minutes to let it bloom. Blooming basically means letting the gelatin swell and absorb that water.
Crucial Tip: Give it a quick mix, but don’t whip it! You don’t want to incorporate air. Just kind of push the gelatin down to try and get it to come in contact with the water so there are no clumps. Also, make sure your water is cold, otherwise, the gelatin won’t absorb properly.
If you love flavored gummy experiments like this, also try my Gummy Peanut Butter & Jelly for nostalgic bites!
2. Cook Up That Sweet Gummy Goodness
Into a medium-sized saucepan over medium-high heat, add your sugar and corn syrup. (Pro tip: microwave the corn syrup for about 10 seconds just so it’s easier to pour!)
Next, add your sorbitol. Sorbitol is basically a sugar alcohol, but it adds a certain texture that is very specific to gummy bears, so you really don’t wanna skip it! Bring this mixture to a simmer, then reduce the heat to medium.
3. The Wet Pastry Brush Trick
Cook it for about one minute until the sugar is completely dissolved. If you see a few granules of sugar sticking to the outside edge of the pan, use a clean, damp pastry brush to brush down the inside walls. You do this to make sure you don’t accidentally crystallize your sugar mixture.
4. Combine and Add the Tartness
Remove the pan from the heat, add in your bloomed gelatin, and stir until it’s completely melted and dissolved. Finally, stir in your citric acid. This gives the candy that tart, slightly sour flavor that most people associate with gummy bears. You can totally leave it out if you prefer, but I highly recommend trying it!
5. The Secret to Smooth, Shiny Bears
Let your gummy mixture sit undisturbed in the pan for about 5 to 10 minutes to let the foam rise to the top. Once it’s up there, carefully scoop it off and discard it! Any foam that sits on the surface of your candy is not going to go away, so if you want your gummy bears to be super crystal-clear, smooth, and shiny, you have to get rid of it.
6. Strain, Flavor, and Color
Divide your clear gummy mixture into separate bowls, pouring it through a teeny tiny fine mesh strainer to catch any lumps or imperfections.
Now, add your flavorings! I used LorAnn concentrated candy oils in raspberry, strawberry, and tropical punch. Since they are concentrated, you only need about 1 teaspoon (or three dropper-fulls) per bowl. Mix them up, then add a drop of food coloring (like electric pink, blue, or yellow) to make the colors really pop.
7. Prep the Molds
Grab your silicone gummy bear molds—very vital if you want to make gummy bears! Lightly spray them with cooking spray or oil so the gummies don’t stick.
The Paintbrush Hack: Take a little, clean food-safe paintbrush to work the oil into all the tiny crevices, then wipe off the excess and flip the mold over for a minute to let it drain. You don’t need a ton of oil!
8. Fill ‘Em Up
Use the little dropper or syringe that comes with your molds to suck up the liquid and carefully squeeze it right into the cavities. If any pesky bubbles form, just pop them with a toothpick.
9. Chill Out and Dry!
Put the molds into the refrigerator for at least 6 hours, but preferably overnight, to let them fully set.
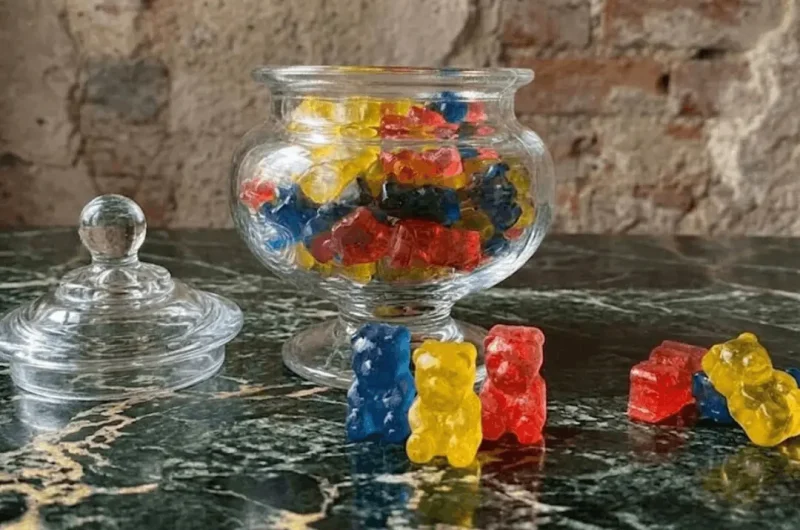
Once they are firm, they pop out super easy. They are nice and shiny from the oil and look absolutely gorgeous! For the best authentic texture, let the gummies air dry on the counter for 12-24 hours. They’ll actually dry out more over time, giving you that classic, chewy gummy bear texture. Store them in a Ziploc bag or airtight container. Go forth, switch up the flavors, and have a lot of fun!
If you like this recipe Explore more recipes
FAQs
How do I make homemade gummy bears shelf-stable?
Great question! To make your gummy bears shelf-stable, you need to use a high-quality gelatin with a high bloom strength (like Knox). You also need to include citric acid, which acts as a preservative and adjusts the pH to prevent stickiness. Finally, allowing them to air-dry on the counter after unmolding helps reduce moisture, keeping them stable at room temperature!
Why are my homemade gummies sticky or too soft?
If your gummies are too soft or sticky, it usually means there is too much moisture in your recipe, or the gelatin didn’t bloom properly. Always make sure your water is cold when blooming the gelatin. If they are still sticky after unmolding, try letting them sit out on the counter to air dry for 12-24 hours! Coating them in a tiny bit of cornstarch can also help.
Can I use fruit juice or alcohol instead of water?
You totally can! You can swap the water for juice, wine, sparkling cider, or champagne to make grown-up gummies. Just a heads-up: if you use fresh fruit juice from pineapple, kiwi, mango, or papaya, you must cook the juice first. Those raw fruits contain enzymes that will actually destroy the gelatin and prevent your gummy bears from setting!
How do I prevent gummy bears from sticking to the molds?
Silicone gummy bear molds are vital, but you still need a release agent. I like to spray the mold with a little bit of vegetable oil, then use a clean, dry paintbrush to push the oil into all the little bear crevices. Wipe off the excess so they don’t get greasy, flip it upside down to drain, and your bears will pop right out perfectly shiny!
Homemade Authentic Shelf-Stable Gummy Bears
Course: Dessert, CandyCuisine: AmericanDifficulty: Medium150
gummy bears15
minutes5
minutes8
kcal360
minutes6
hours20
minutesLearn how to make shiny, chewy, authentic gummy bears right at home! This shelf-stable recipe uses real candy flavoring, sorbitol, and gelatin for that perfect classic texture.
Ingredients
- Equipment Needed:
Silicone gummy bear molds
Syringe or dropper
Clean pastry brush
Fine mesh strainer
- Ingredients:
118 ml (½ cup) cold water (or clear juice/wine)
35 g (¼ cup) unflavored gelatin powder (high bloom strength)
150 g (¾ cup) granulated sugar
85 g (¼ cup) corn syrup
15 g (1 tbsp) sorbitol
2 g (½ tsp) citric acid
5 ml (1 tsp) concentrated candy flavoring oils (per batch/flavor)
1-2 drops food coloring
Vegetable oil (for greasing molds)
Directions
- In a bowl, sprinkle gelatin over cold water. Gently press down to remove clumps without whisking in air. Let bloom for 5-10 minutes.
- In a medium saucepan, combine sugar, corn syrup (microwaved 10 seconds for easy pouring), and sorbitol. Heat over medium-high until simmering.
- Reduce heat to medium. Cook for 1 minute until sugar dissolves. Brush down the sides of the pan with a wet pastry brush to prevent crystallization. Remove from heat.
- Stir the bloomed gelatin into the hot sugar mixture until completely dissolved. Stir in the citric acid.
- Let sit for 5-10 minutes. A layer of foam will rise to the top—scoop this off and discard it for clear gummies.
- Strain the mixture evenly into separate bowls. Stir in your candy flavorings and food coloring.
- Lightly oil your silicone molds, brushing the oil into the crevices and wiping off the excess.
- Use a dropper to fill the molds. Pop any bubbles.
- Refrigerate for at least 6 hours, preferably overnight.
- Pop the gummies out of the molds! Store in an airtight container or let them sit at room temperature to dry out for a chewier texture.
Notes
- Storage: Store your homemade gummies in an airtight container or Ziploc bag in a cool, dry place. They are shelf-stable
- Texture Pro-Tip: If you’ve ever had a fresh bag of gummy bears that are super soft, it’s because they are young! Letting these sit out on the countertop will actually cause them to dry out and get that classic, firm gummy chew over time.
- Grown-Up Gummies: Want to make alcoholic gummies? Swap the cold water out for wine, champagne, or sparkling cider!
- Sorbitol: Don’t skip the sorbitol! It is a sugar alcohol that gives commercial gummies their signature bouncy, authentic texture.