
Red velvet brownies are one of my absolute favorite things to make. They’re sweet, super fudgy, and topped with the most amazing cream cheese frosting.
They’re pretty much perfect any time of year—Christmas, Halloween, Valentine’s Day, or just a random Tuesday. They come together quickly and easily, so if you love brownies (especially the red velvet kind), you’re going to be obsessed with these.
If you’re in a baking mood, you might also love my Small‑Batch Red Velvet Cake or these Heart‑Shaped Cupcakes for an extra cute treat.
Why You’ll Love This
- The Texture: These aren’t cakey. They’re fudgy, moist, and have that little bit of crackly top.
- The Frosting: A silky cream cheese layer that adds just the right tang to balance the sweetness.
- Super Easy: No fancy tools—just a hand mixer, a bowl, and a craving for chocolate.
Craving even more rich, chocolatey desserts? Try my Salted Caramel Chocolate Tart or Super Simple Dark Chocolate & Pistachio Bark next.
What equipment and ingredients You’ll Need
Special Equipment
- 8×8‑inch square baking tin (metal is best for brownies)
- Electric hand mixer
- Parchment paper
- Rubber spatula
For the Brownies
- 170 g (¾ cup) unsalted butter, melted and slightly cooled
- 250 g (1¼ cups) granulated sugar
- 1 large egg
- 1 egg yolk
- 1 tsp vanilla extract
- 1 tsp lemon juice or white vinegar (for that red velvet tang)
- 1 tsp red gel food coloring (highly concentrated, like Sugarflair or Wilton)
- 150 g (1¼ cups) all‑purpose (plain) flour
- 20 g (3 tbsp) cocoa powder
- ½ tsp salt
- 100 g (½ cup) white chocolate chips
For the Cream Cheese Frosting
- 60 g (¼ cup) unsalted butter, softened
- 120 g (½ cup) full‑fat cream cheese, softened (brick style)
- 1 tsp vanilla extract
- 250 g (2 cups) icing sugar (powdered sugar), sifted
Let’s Get Baking!
1. Preheat & Prep
Preheat your oven to 180°C (160°C fan) / 350°F. Line an 8×8‑inch square tin with parchment paper, letting it overhang the sides for easy lifting.
Pro tip: Use a second 8×8 tin to press the parchment neatly into the corners.
2. Whisk the Wet Ingredients
In a large mixing bowl, add the melted, slightly cooled butter and granulated sugar. Beat with an electric hand mixer until fully combined.
Add the egg, egg yolk, vanilla extract, and lemon juice or vinegar. Whisk on high speed for a few minutes until the mixture becomes pale, thick, and fluffy. This step helps give you that shiny, crackly top.
3. Add Dry Ingredients
Sift in the flour, cocoa powder, and salt.
Switch to a spatula and gently fold the dry ingredients into the wet until just barely combined. Don’t overmix—this keeps the brownies fudgy instead of cakey.
4. Color It Red
Before the flour is fully worked in, add your red gel food coloring. A concentrated gel like Sugarflair Red Extra or Wilton is ideal; you only need a small amount for a vibrant color.
Fold gently until the batter is evenly bright red. Avoid using your hands directly on the gel—it will stain everything it touches.
5. Add Chips & Bake
Fold in the white chocolate chips until evenly distributed.
Pour the batter into the lined tin and spread it into an even layer. Bake for 20–25 minutes. The top should look set and slightly crisp, and a toothpick inserted near the center should come out with moist crumbs, not wet batter. If it comes out completely clean, they’re likely a bit overbaked.
6. Cool Completely
Let the brownies cool completely in the tin on a wire rack. This helps them set properly and makes slicing much easier, especially once frosted.
7. Make the Cream Cheese Frosting
In a medium bowl, beat the softened butter and cream cheese together until smooth and creamy.
Add the vanilla extract, then gradually beat in the icing sugar until you have a thick, smooth, spreadable frosting.
8. Frost & Slice
Once the brownies are completely cool, lift them out of the tin using the parchment. Spread the cream cheese frosting all the way to the edges in an even layer.
For extra neat squares, chill the frosted slab in the fridge for about 30 minutes. Then slice into 16 squares. 10 out of 10, would make again.
If you like this recipe Explore more recipes
FAQs
Why do I need to add vinegar or lemon juice?
It sounds strange, but a splash of acid gives that classic red velvet “tang” and helps keep the color vibrant. You won’t taste straight vinegar in the finished brownie—just a subtle flavor boost.
Can I use liquid food coloring?
I don’t recommend it. Liquid color is weak and you’d need a lot, which can throw off the batter’s texture. Gel food coloring is much more concentrated, so you get a rich red without watering anything down.
Why aren’t my brownies fudgy?
The two main culprits are overbaking and overmixing. Pull them when a toothpick has moist crumbs (not clean), and stop folding as soon as the flour disappears. Mixing too long after adding flour builds gluten, which makes brownies more cakey than fudgy.
How should I store these?
Because of the cream cheese frosting, keep the brownies in an airtight container in the fridge. They’ll stay delicious for about 4–5 days. Try not to leave them at room temperature for more than a couple of hours.
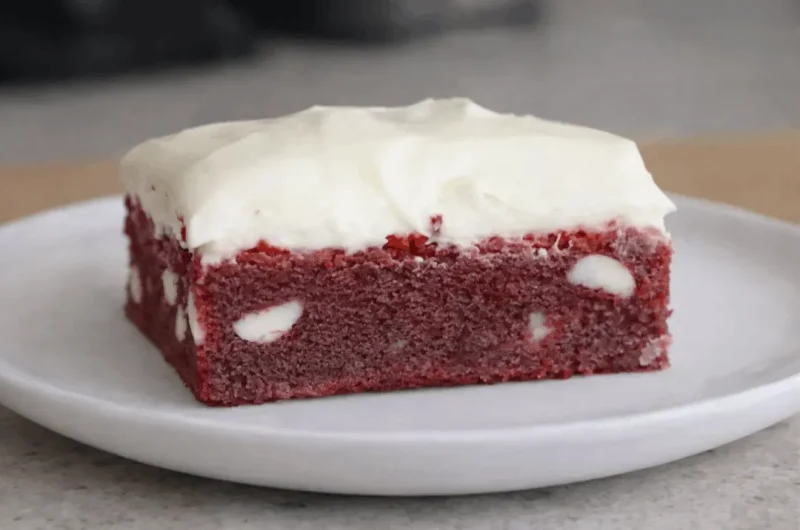
Sweet Fudgy Red Velvet Brownies with Cream Cheese Frosting
Course: DessertCuisine: AmericanDifficulty: Easy16
squares20
minutes20
minutes280
kcal1
hour1
hour40
minutesDecadent, fudgy red velvet brownies studded with white chocolate chips and topped with a thick layer of silky cream cheese frosting. Perfect for Valentine’s Day, Christmas, or any random Tuesday.
Ingredients
- Equipment Needed
8×8‑inch baking tin
Electric hand mixer
Mixing bowls
Spatula
Parchment paper
- Ingredients
- Brownies
170 g unsalted butter, melted and slightly cooled
250 g granulated sugar
1 large egg
1 egg yolk
1 tsp vanilla extract
1 tsp white vinegar or lemon juice
1 tsp red gel food coloring
150 g all‑purpose (plain) flour
20 g cocoa powder
½ tsp salt
100 g white chocolate chips
- Cream Cheese Frosting
60 g unsalted butter, softened
120 g full‑fat cream cheese, softened (brick style)
1 tsp vanilla extract
250 g icing sugar, sifted
Directions
- Preheat oven to 180°C (160°C fan) / 350°F. Line an 8×8‑inch tin with parchment, leaving overhang.
- In a large bowl, whisk melted butter and sugar until combined.
- Add egg, egg yolk, vanilla, and vinegar or lemon juice. Beat until pale, thick, and fluffy.
- Sift in flour, cocoa powder, and salt. Fold gently with a spatula until just combined.
- Add red gel food coloring and fold until the color is vibrant and even.
- Fold in white chocolate chips.
- Spread batter evenly in the prepared pan and bake 20–25 minutes, until the top is set and a toothpick comes out with moist crumbs.
- Cool completely in the pan on a rack.
- For the frosting, beat softened butter and cream cheese until smooth. Add vanilla, then gradually beat in icing sugar until thick and creamy.
- Spread frosting over cooled brownies.
- Chill briefly for cleaner cuts, then slice into 16 squares.
Notes
- Storage: Store frosted brownies in an airtight container in the fridge and enjoy within 4–5 days. Bring to room temperature for a few minutes before serving if you prefer a softer texture.
- Clean Cuts: Chill frosted brownies for 30 minutes, then slice with a sharp knife, wiping the blade with warm water between cuts.
- Food Coloring: Use a concentrated gel (like Wilton or Sugarflair). Liquid food coloring is too watery and won’t give a deep red.