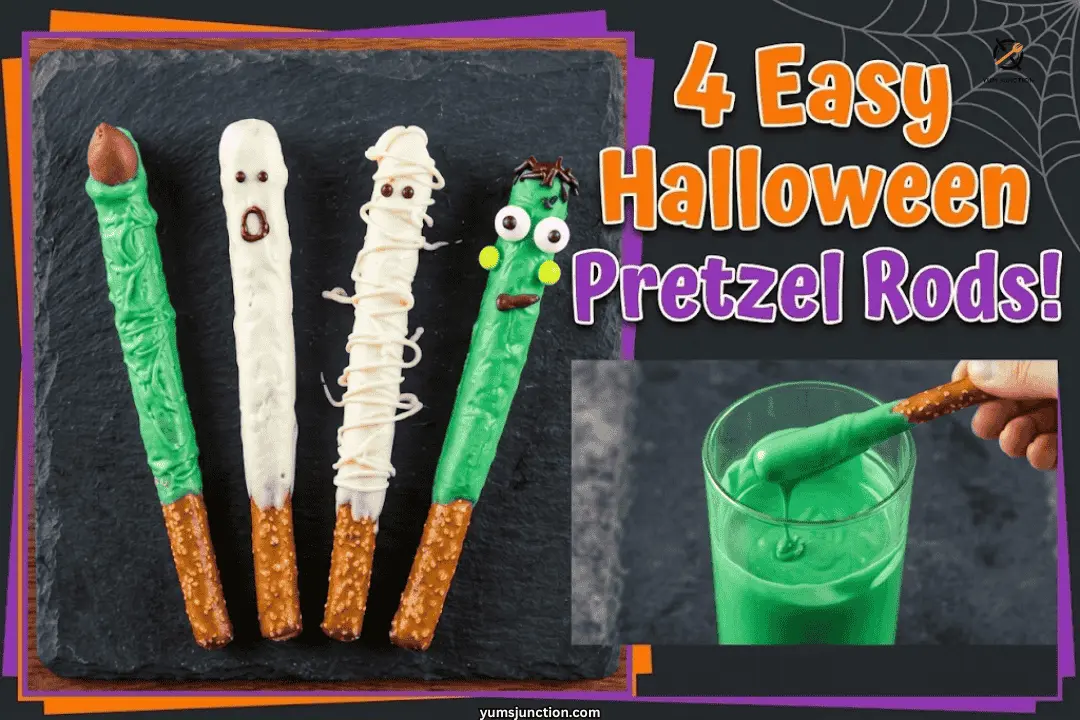
These Halloween pretzel rods are salty pretzels dipped in melted candy melts and chocolate, then decorated into four spooky designs: Wicked Witch Fingers, Ghostly Pretzel Rods, Frankenstein Monster, and Mummy Mania. No baking required, just melting and dipping, and the whole batch comes together in about 30 minutes. They’re one of the easiest halloween party snacks to make with kids.
I am going to tell you how to make a bunch of different Halloween pretzel rods using just a few simple ingredients.
If you are looking for the perfect sweet and salty treat for your upcoming Halloween party, you have come to the right place. These are all incredibly simple recipes, so keep reading and I will tell you exactly how to make them. We are going to make four spooky variations: Wicked Witch Fingers, Ghostly Pretzel Rods, Frankenstein Monster, and Mummy Mania Pretzel Rods.
Table of Contents
Why You Will Love This Easy Halloween Pretzel Rods Recipe
You are going to love making these because they are super easy, require zero baking, and are absolutely perfect for getting the kids involved. You only need a few simple ingredients, mostly just candy melts, chocolate, and pretzel rods.
- No oven required, just a microwave and a little patience
- Totally customizable, it does not have to be perfect because these are mummies and monsters, right?
- Great for a crowd, easy to scale up for a classroom or party table
- Wonderfully sweet and salty, and always a huge hit at Halloween parties
If chocolate-dipped Halloween treats are your thing, my Halloween Chocolate Covered Strawberries are another no-bake, kid-friendly option worth adding to your party table.
What You Will Need
Special Equipment
- Baking sheet
- Wax paper or parchment paper
- Tall and narrow microwave safe glass or mug (perfect for dipping the rods easily)
- Piping bags (or zip top bags with the very corner snipped off)
- Toothpicks
- Fork
The Ingredients
- 1 bag (12 to 16 oz) sturdy pretzel rods
- 1 bag (12 oz) green candy melts
- 1 bag (12 oz) white candy melts
- 1/2 cup milk chocolate or dark chocolate chips
- 1 to 2 tsp vegetable oil (or coconut oil) as needed to thin the candy melts
- 24 whole almonds (for Witch Finger Nails)
- 1/4 cup chocolate sprinkles (for Frankenstein Hair)
- 1 package edible candy eyeballs
- Small round yellow candies like baking M&Ms or similar (for Frankenstein Bolts)
Let Us Get Decorating
1. Prep Your Workspace
Line a large baking sheet with wax paper or parchment paper. Set out all your sprinkles, almonds, and candies in shallow bowls so they are ready to go.
2. Make the Witch Finger Almond Nails
Melt the milk or dark chocolate in the microwave in 30 second intervals until smooth. Dip your whole almonds into the chocolate, covering them completely. Use a fork to lift them out, tap off the excess chocolate, and place them on the wax paper to harden.
3. Melt the Candy Coatings
In separate tall and narrow microwave safe glasses, melt your green candy melts and white candy melts. Microwave in 30 second intervals, stirring in between. My big tip here is if you find your candy melts are too thick, just add a little bit of vegetable oil to it, mix it in there, and that will thin it out beautifully.
4. Dip the Pretzels
Take a pretzel rod and dip it about two thirds of the way into your melted candy coating. Leave the bottom third bare as a handle. Lift it out and tap the glass gently to shake off the excess. Place it flat on your wax paper. Now let us turn them into monsters.
5. Spooky Variation 1: Wicked Witch Fingers
These look really cool and slightly creepy. We start with the almond nails we made earlier to create a dark and bumpy fingernail. Once those harden up, dip your pretzel rods into the vibrant green candy melts. Leave about a third of the pretzel bare so people have a handle to hold onto. While the green chocolate is still wet, pop that chocolate covered almond right on the tip. Take a toothpick and draw a few horizontal lines to look like knuckles. Simple and spooky.
6. Spooky Variation 2: Ghostly Pretzel Rods
These ghosts are super easy. You only need white candy melts and some milk or dark chocolate. That is it, that is all you need. Just dip the rod about two thirds of the way into the melted white chocolate and let it harden on some wax paper. Once it is set, melt down some milk chocolate and use a toothpick or piping bag to draw on two little eyes and a wide open screaming mouth.
7. Spooky Variation 3: Frankenstein Monster
This is probably one of my favorites. Dip the pretzels in green candy melts just like the witch fingers. But this time, while the green candy is still wet, dip the very top into chocolate sprinkles to serve as Frankenstein hair. Pop on two edible candy eyeballs, and stick two little round yellow candies on the sides of his jaw to act as the bolts. You may have to hold them in place for a few seconds. Once he sets up, use some melted chocolate in a piping bag to draw on a stitched mouth and a cool scar above his eyes.
Loving these cute Halloween shapes? My Rice Crispy Eyeballs are another no-bake, wildly easy Halloween treat kids love decorating.
8. Spooky Variation 4: Mummy Mania
These are really fun and simple too. Start with your white chocolate dipped pretzel rods. Once that base coat hardens, take some more melted white chocolate, put it into a piping bag, and drizzle it all over the pretzel in a consistent pattern to look like mummy bandages. Pro tip: if your drizzle breaks or messes up, just try it again, no pressure. It does not have to be perfect because they are mummies. Finish them off by piping two small milk chocolate dots for the eyes.
9. Set and Serve
Let all the pretzel rods harden completely at room temperature or in the fridge for about 10 minutes before serving. Enjoy your spooky treats.
What to Serve With This
These sweet and salty pretzel rods pair perfectly with a mix of other Halloween party snacks.
- Set them out alongside a savory bite like my Mummy Meatballs for a sweet-and-savory Halloween spread
- Add a bowl of caramel or extra melted chocolate for dipping
- Pair with orange or purple punch for a full spooky color palette
- For an adult gathering, arrange them on a dark slate board with fresh fruit for contrast
If you like this recipe Explore more recipes
FAQs
How far in advance can I make chocolate covered pretzel rods?
You can easily make these 1 to 2 weeks in advance. Hard baked pretzel rods are incredibly shelf stable, and the chocolate coating acts as a barrier. Just be sure to store them in a completely dry and airtight container.
What is the best way to store chocolate covered pretzel rods so they do not go stale?
Store them in an airtight plastic container right at room temperature. If you need to stack them, separate the layers with wax or parchment paper. Do not store them in the refrigerator, since the cold and moist air of a fridge will make the exposed pretzel ends super soggy.
What should I do if my melted candy melts are too thick?
If you find your candy melts did not melt very well and are too thick, you can add a little bit of vegetable oil (or coconut oil) to it. Just mix it right in there, and that will thin it out beautifully. Do not add water or milk, or your chocolate will seize up and turn into a paste.
How do I prevent my dipped pretzels from getting flat bottoms?
When you lay a freshly dipped pretzel flat on wax paper, the excess chocolate pools at the bottom. A great easy fix is to take a block of craft styrofoam and use a clean pretzel to press holes into it. Once you dip your pretzels, just stand them upright in the styrofoam holes to dry completely.
Can I make these for a school party or a big group?
Yes, this recipe scales up really easily since it is just melting and dipping. Set up an assembly line with the coatings and toppings in bowls, and let helpers work down the line. Just double check your school or venue’s allergy policy first, since this recipe contains tree nuts.
Are chocolate covered pretzel rods safe for kids to help make?
For the most part, yes, this is a great hands-on project for kids, but a few parts need adult supervision. Melting chocolate in the microwave should be handled by an adult, and if you are making these for very young children, consider skipping the whole almonds and small candies to reduce choking risk, or have an adult do that step.
Can I make these without a microwave?
Yes, you can melt your candy melts and chocolate using a double boiler on the stovetop instead. Use low heat and stir constantly, since chocolate scorches easily on direct heat.
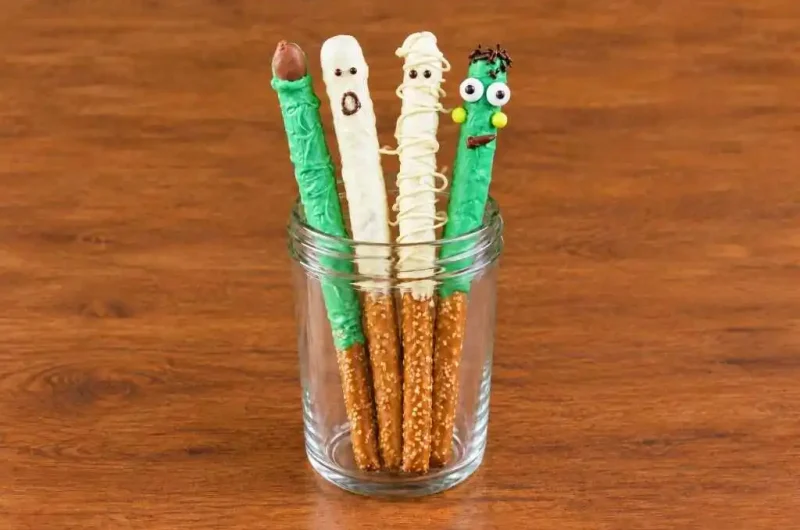
4 Easy Halloween Pretzel Rods
Course: Dessert, SnacksCuisine: AmericanDifficulty: easy24
pretzel rods20
minutes150
kcal10
minutes30
minutesFun, spooky, and simple sweet-and-salty Halloween treats made four ways. Create Witch’s Fingers, Ghosts, Frankensteins, and Mummies with just a few ingredients.
Ingredients
- Equipment Needed:
Baking sheet
Wax paper or parchment paper
Tall, narrow microwave-safe glasses (for dipping)
Piping bags (or zip-top bags)
Toothpicks
Fork
- Ingredients:
340 g (12 oz) sturdy pretzel rods (about 24 rods)
340 g (12 oz) green candy melts
340 g (12 oz) white candy melts
85 g (1/2 cup) milk or dark chocolate chips
5 to 10 ml (1 to 2 tsp) vegetable oil or coconut oil, optional, for thinning
24 whole raw almonds
40 g (1/4 cup) chocolate sprinkles
1 small package edible candy eyeballs
24 small round yellow candies, for Frankenstein’s bolts
Directions
- Line a baking tray with wax or parchment paper. Organize all sprinkles and decorations into small bowls.
- Melt the milk chocolate in the microwave in 30-second bursts. Dip the almonds into the chocolate using a fork, tap off excess, and let dry on the wax paper.
- Place the green and white candy melts into separate tall, narrow glasses. Melt in the microwave in 30-second intervals until smooth. If thick, stir in a little vegetable or coconut oil to thin it out.
- Dip each pretzel rod two-thirds of the way into the candy melts, leaving a handle at the bottom. Tap off the excess.
- For Witch’s Fingers, while the green coat is wet, add a chocolate almond to the tip. Score knuckles with a toothpick.
- For Frankensteins, while the green coat is wet, dip the top into chocolate sprinkles. Add candy eyes and yellow candy bolts to the sides. Once dry, pipe a milk chocolate scar and mouth.
- For Ghosts, once a white-coated rod is dry, pipe two milk chocolate eyes and an open mouth.
- For Mummies, once a white-coated rod is dry, use a piping bag to drizzle extra white chocolate across the pretzel like bandages. Pipe two milk chocolate eyes.
- Allow all pretzels to harden fully before serving.
Notes
- Storage: Store in an airtight plastic container at room temperature for up to 1 to 2 weeks. Do not store in the refrigerator long-term, as the exposed pretzel ends will get soggy.
- Preventing Sweating: If you pop them in the fridge to set quickly, only leave them in for 5 to 10 minutes. Taking cold chocolate into a warm room causes condensation.
- Pro Tip for Flat Bottoms: Poke holes in a block of craft styrofoam with a dry pretzel, then stand your wet dipped pretzels upright to dry without flat spots.
- Thinning Chocolate: Never use water or liquid food coloring to thin your chocolate, it will seize. Stick to a drop of vegetable oil, coconut oil, or vegetable shortening.
- Allergen Note: Contains tree nuts (almonds) and typically dairy and soy from candy melts and chocolate. Check your specific brands if serving to a group with allergies.
- Choking Hazard Note: Whole almonds and small candies are a choking risk for very young children, use adult judgment or omit for toddlers.