

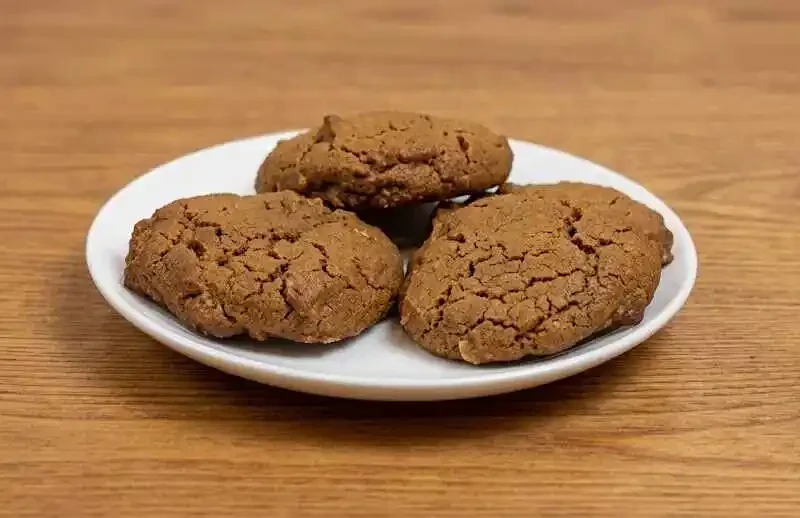
These chewy molasses cookies use cold butter (not softened!) creamed with sugar, a healthy dose of unsulfured molasses, and warm spices like ginger and cinnamon for a thick, soft, pillowy cookie. They come together in about 25 minutes total, making them one of the easiest cozy fall and winter baking projects you can pull off on a weeknight.
I am going to tell you how to make a batch of these classic and comforting chewy molasses cookies. These cookies are absolutely chewy and delicious, and the whole kitchen smells just great after baking them.
They are really quite easy to make, and you will be licking the beaters later on!
Table of Contents
Why You Will Love These Chewy Molasses Cookies
- The Ultimate Chewy Texture: By using cold butter and a healthy dose of molasses, we get a cookie that is thick, soft, and perfectly pillowy.
- That Amazing Kitchen Smell: Ground ginger, cinnamon, and molasses baking in the oven? Your house is going to smell incredible.
- The Perfect Dunker: These hold up beautifully to a quick dunk in hot milk, coffee, or tea.
- No Floury Bottoms: We use a special trick of dusting the baking tray with icing sugar instead of flour so the bottoms never taste burned or bitter.
If you love a cozy, spiced cookie like this one, you are also going to want to try my Easy Pumpkin Snickerdoodle Cookies, another warm, comforting cookie that fills the whole house with the same amazing smell.
What You Will Need
Special Equipment
- Large mixing bowl
- Wooden spoon, for creaming cold butter
- Electric hand mixer
- Measuring cups and spoons
- Baking tray
- Cooling rack
The Wet Ingredients
- 1/2 cup (115g or 1 stick) butter, cold
- 1/2 cup (100g) unrefined cane sugar (granulated sugar works too)
- 1 large egg, room temperature
- 3/4 cup (180ml) unsulfured molasses (do not use blackstrap!)
The Dry Ingredients
- 2 1/4 cups (280g) all purpose flour
- 1 tsp (6g) baking soda
- 1/2 tsp (1g) ground ginger
- 1/2 tsp (1g) ground cinnamon
- 1/4 tsp (1.5g) salt
For the Baking Tray
- Butter, for greasing
- Icing sugar or powdered sugar, for dusting
Let us Get Baking!
1. Cream the Cold Butter
Toss the cold butter into a large mixing bowl. Using a wooden spoon, beat and cream that butter just to soften it up a bit. You do not want that butter too warm. You do not want it at room temperature. You want it cold!
2. The Secret to the Lift
Once the butter is slightly softened, add the unrefined cane sugar. Cream the sugar directly into the cold butter. This is a very important step! What happens is when you are creaming the sugar into a colder butter, it actually tears the butter. It puts these little pockets of air in there, and that is part of what gives your cookie that beautiful lift. It makes a big difference in your cookies!
The Cold Butter Trick Explained
This is genuinely the most important technique in the entire recipe, so it is worth understanding why it works. Most cookie recipes call for softened, room temperature butter, but creaming sugar into cold butter instead physically tears tiny pockets of air into the fat as you mix. Those little air pockets are exactly what gives these cookies their thick, pillowy lift instead of a thin, flat spread. If your kitchen runs warm, or if your dough starts to feel too soft at any point, popping the bowl in the fridge for an hour will get you right back on track.
3. Mix the Wet Ingredients
Switch to your electric mixer. Crack the room temperature egg into the butter mixture and beat that in first. Then add the molasses. Use a spatula to get it all out! Beat on medium speed for less than a minute until the mixture is completely smooth.
4. Prep the Dry Ingredients
In a separate smaller bowl, quickly combine the all purpose flour, baking soda, ground ginger, ground cinnamon, and salt.
5. Combine Wet and Dry
Add the dry flour mixture to the wet molasses mixture. Mix just until combined. Do not overmix!
If you love a cozy, dunk-worthy baked good like these cookies, my Cinnamon Swirl Coffee Cake is another warm, comforting recipe built for the exact same hot-drink-and-a-treat moment.
6. Prepare the Tray
Preheat your oven to 350°F (180°C). Lightly butter a baking tray, then give it a light dusting of icing sugar. We use icing sugar because flour tends to burn in the oven on the second or third batch, but icing sugar just adds a little extra sweetness!
7. Scoop the Cookies
Use a spoon to drop good and generous spoonfuls of dough onto the prepared tray. Set them about 1 inch (2.5 cm) apart. They might smoosh together just a little bit while baking, but that is okay because they are still just as tasty.
8. Bake
Bake for 10 to 15 minutes. You just want them to firm up on the outside. Note that for the absolute chewiest cookie, pull them out closer to the 10 minute mark when the edges are set but the centers are still soft!
9. Cool and Enjoy
When they come out of the oven, they should be puffed up nicely with a little crackling on top. Let them sit on the warm baking sheet for 3 to 4 minutes to firm up. Move the cookies to a cooling rack to cool completely. Grab a glass of hot milk, dunk, and enjoy!
If you like this recipe Explore more recipes
FAQs
What kind of molasses should I use for baking cookies?
You absolutely want to use light or dark unsulfured molasses for these. Whatever you do, avoid blackstrap molasses! Blackstrap is boiled multiple times, making it super dark, dense, and bitter. It will completely overpower the sweet spices of your cookie.
Why did my molasses cookies not crack or crinkle on top?
There are a couple of things that cause this! First, your baking soda might be expired, since that is what gives the cookie its lift and subsequent collapse to form those lovely cracks. Second, if your dough got too warm before baking, the cookies will melt too fast in the oven and bake flat instead of cracking.
Why are my molasses cookies spreading too much and turning out flat?
This usually happens if your butter gets too warm! That is exactly why use the cold butter creaming trick in this recipe. If your dough feels too soft or your kitchen is hot, just cover the bowl and chill the dough in the fridge for an hour. Cold dough guarantees a thicker and chewier cookie that does not spread into a pancake.
How do you keep molasses cookies soft after baking?
If you manage not to eat them all on the first day, store them in an airtight container at room temperature with a slice of plain white bread tucked inside. The cookies will actually absorb the moisture from the bread, keeping them perfectly soft and chewy for days!
Are these the same as gingerbread cookies?
They are closely related but not quite the same. This recipe is a soft, chewy molasses spice cookie, similar in flavor profile to gingerbread since both rely on molasses, ginger, and warm spices. Traditional gingerbread cookies, especially the rolled and cut kind, are typically firmer and hold their shape well for decorating, while these are meant to stay thick, soft, and pillowy straight off the baking sheet.
Can I freeze the dough or the baked cookies?
Yes to both! For the dough, scoop it into individual portions, freeze them on a tray until solid, then transfer to a freezer bag for up to 3 months. Bake straight from frozen, adding a couple of extra minutes to the bake time. For the baked cookies, let them cool completely, then store in an airtight container or freezer bag for up to 3 months. Thaw at room temperature, or warm briefly in a low oven to bring back that fresh-baked softness.
Seriously Delicious Chewy Molasses Cookies
Course: DessertCuisine: AmericanDifficulty: Easy24
cookies15
minutes10
minutes125
kcal25
minutesOld-fashioned, perfectly spiced molasses cookies that are incredibly soft, chewy, and practically beg to be dunked in a mug of hot milk. A cozy fall and winter baking staple!
Ingredients
- Equipment Needed:
Wooden spoon
Electric mixer
Baking sheet
Cooling rack
- Ingredients:
115g (1/2 cup) butter, cold
100g (1/2 cup) unrefined cane sugar
1 large egg, room temperature
180ml (3/4 cup) unsulfured molasses
280g (2 1/4 cups) all-purpose flour
6g (1 tsp) baking soda
1g (1/2 tsp) ground ginger
1g (1/2 tsp) ground cinnamon
1.5g (1/4 tsp) salt
Butter and icing sugar, for prepping the baking tray
Directions
- Place the cold butter in a large bowl and use a wooden spoon to roughly cream and soften it.
- Add the cane sugar and cream it into the cold butter to create air pockets for lift.
- Using an electric mixer, beat in the room-temperature egg.
- Pour in the molasses and beat until the wet mixture is completely smooth.
- In a separate bowl, whisk together the flour, baking soda, ginger, cinnamon, and salt.
- Add the dry ingredients to the wet ingredients. Mix just until combined; do not overmix.
- Preheat oven to 350°F (180°C). Lightly butter a baking sheet and dust it with a little icing sugar to prevent sticking and burning.
- Drop spoonfuls of dough onto the tray, leaving about 1 inch (2.5 cm) between each.
- Bake for 10 to 15 minutes, aiming for 10 minutes for an ultra-chewy center. The outsides should be set and crackly.
- Let cool on the baking tray for 3 to 4 minutes before transferring to a wire cooling rack.
Notes
- The Cold Butter Trick: Do not let your butter get to room temperature. Creaming sugar into cold butter tears the fat, creating tiny air pockets that give these cookies their amazing texture.
- Molasses Type: Always use light or dark unsulfured molasses. Avoid blackstrap molasses, as it is far too bitter and salty for baking.
- The Icing Sugar Trick: Dusting your baking tray with icing sugar instead of flour prevents the bottoms of the cookies from getting that bitter, burned flour taste, especially if you reuse the pan for multiple batches.
- Want an Even Thicker Cookie? If your kitchen is very warm, pop the bowl of dough in the fridge for 1 to 2 hours before baking. Cold dough spreads less, giving you a thicker, chewier cookie.
- Raw Dough Caution: This dough contains raw egg and raw flour. As tempting as those beaters are, avoid eating raw dough or batter, and wait until the cookies are fully baked.
- Allergen Note: Contains gluten, egg, and dairy.
- Freezing: Both raw dough (scooped and frozen individually) and baked cookies freeze well for up to 3 months.
- Nutrition: Calories are estimated and will vary based on cookie size and scoop amount.