
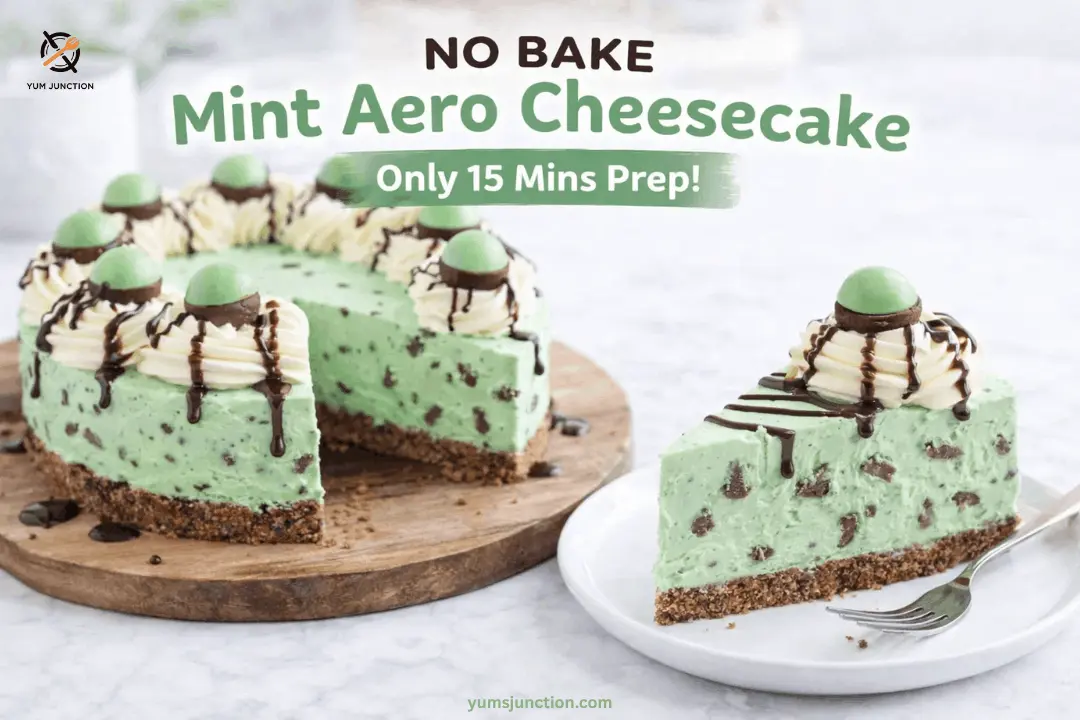
⏱️ Prep: 15 mins | ❄️ Chill: 6 hrs | 🍰 Servings: 12 | ✅ Difficulty: Easy
You guys! If you love mint and chocolate, you’re gonna freak out over this. Like, this is the easiest, creamiest, and mintiest no-bake cheesecake you will ever make. No oven needed.
It’s an absolute dream—packed full of chunks of Mint Aero and those cute little Mint Aero Bubbles.
And if you’re as obsessed with mint-chocolate combos as I am, you need to try my St. Patrick’s Day Special: Amazing Chocolate and Mint Lava Cake! too—that molten center with the same minty vibe is unreal.
And get this, it literally takes about 15 minutes to make. You just pop it in the fridge overnight, and the next day, you’ve got this amazing, really quick, and really simple dessert. It features a dark chocolate digestive biscuit base, which is just… oh my god. And the cheesecake filling? It’s so quick and simple, you’ll never go back to using gelatin again!
Table of Contents
Why You’ll Love This
- 15 Minutes Prep: Seriously, 15 minutes at the most. You mix it up, pop it in the tin, and let the fridge do the hard work.
- No Gelatin Needed: We rely on full-fat cream cheese and good whipping cream to get that perfect set. No faffing about with gelatin sheets.
- Mint Overload: We aren’t skimping on the chocolate. It’s got Mint Aero bars inside and those bubbly bubbles on top.
- Beginner Friendly: Like I said, if my mum can do it, so can you. It’s practically foolproof as long as you don’t over-whizz the mix!
If you love easy no-bake desserts that impress, also check out my Mint Chip Ice Cream Pie (freezer dessert) and No-Bake Strawberry Cheesecake—they’re just as quick and creamy!
What You’ll Need
Special Equipment:
- 8 or 9-inch Springform Cake Pan (This is essential so you can get the cheesecake out easily!)
- Electric Hand Whisk or Stand Mixer
- Food Processor (or a freezer bag and rolling pin)
- Angled Offset Spatula (for smoothing)
- Piping Bag with French Tip Nozzle (optional, for decoration)
The Biscuit Base:
- 300g Dark Chocolate Digestive Biscuits (or Oreos/regular Digestives)
- 125g Unsalted Butter, melted (and slightly cooled)
The Minty Filling:
- 500g Full-Fat Cream Cheese (e.g., Philadelphia), room temperature
- 100g Icing Sugar (Powdered Sugar)
- 300ml Double Cream (Heavy Cream), cold
- 1 tsp Peppermint Extract (be careful—too much tastes like toothpaste!)
- Green Food Colouring Gel (optional, for that minty look)
- 200g Mint Aero Chocolate Bars, chopped into chunks
For Decoration:
- 150ml Double Cream
- 2 tbsp Icing Sugar
- 1 Bag Mint Aero Bubbles
Let’s Get Mixing!
1. Prep the Tin
Grab your springform pan. Place a piece of baking parchment over the base, clamp the ring on top to trap the paper, and trim the excess around the outside with scissors. This makes getting the cheesecake out nice and easy. Pro Tip: Lightly grease the sides of the tin with a tiny bit of butter to help it release even cleaner later!
2. Make the Base
Crush your dark chocolate digestives. I use a food processor for a fine sandy crumb, but a bag and rolling pin works too. Pour in the melted (but not boiling hot!) butter and give it another whizz until it looks like wet sand.
Tip the buttery crumbs into the prepared tin. Use the back of a spoon to push the crumbs firmly into the base. Pop it in the fridge to chill for at least 30 minutes while you make the filling.
3. Mix the Cream Cheese
In a large bowl, gently beat the room-temperature cream cheese and icing sugar until smooth. This is a great time to stir in your peppermint extract and green food coloring gel so the flavor and color are perfectly even.
Pro Tip: Don’t go crazy here, just get it smooth. If you over-whizz it, it gets runny!
4. Whip the Cream
In a separate bowl, whip the cold double cream until it holds stiff peaks. You want it firm enough to hold its shape, but stop before it turns grainy or “split.”
5. Flavor It Up
Fold the whipped cream into the minty cream cheese mixture. Stir gently with a spatula until combined—we want to keep as much air in there as possible!
6. Add the Chocolate
Throw in your chopped Mint Aero chunks and fold them through so they are evenly distributed.
7. Assemble
Pour the filling over your chilled biscuit base. Use an angled spatula to smooth the top, making sure you get right to the edges.
8. The Hard Part (Waiting)
Pop it in the fridge for at least 6 hours, but honestly, overnight is best to get that perfect, firm slice.
9. Decorate
Once set, run a warm knife (dipped in hot water and dried) around the edge of the tin and release the clamp. Whip the remaining double cream with a little icing sugar until pipeable. Pipe swirls on top and finish with Mint Aero Bubbles.
If you like this recipe Explore more recipes
FAQs
Why is my cheesecake not setting? Help!
Oh no! Usually, this happens if you used low-fat cream cheese or low-fat cream. We need that full-fat goodness to make it firm up without gelatin! It could also be that you over-whizzed the mixture. If you beat it too much, the cream can slacken. Just keep it chilled as long as possible—overnight is always best.
Can I freeze this cheesecake?
Yes, you absolutely can! Once it has fully set in the fridge, take it out of the tin and wrap it up tight. You can freeze it for up to 3 months. Just don’t decorate it with the fresh cream swirls until you’ve defrosted it (do that overnight in the fridge).
Do I have to use the green food coloring?
Nope! That is totally optional. It’s just to give it that minty look so everyone knows what flavour it is before they take a bite. It will taste just as delicious without it, just a bit more creamy-white looking.
Can I use different biscuits for the base?
Go for it! I love dark chocolate digestives because they add that extra richness, but regular digestives, Hobnobs, or even Oreos work amazing. If you use Oreos, you get a super dark, almost black base which looks cool against the green filling.
What if I don’t have peppermint extract?
If you can’t find the extract, you can rely on the mint chocolate bars for flavor, but it will be much milder. I really recommend grabbing a little bottle of extract though—it gives it that real u0022punchu0022 of mintiness that we love!
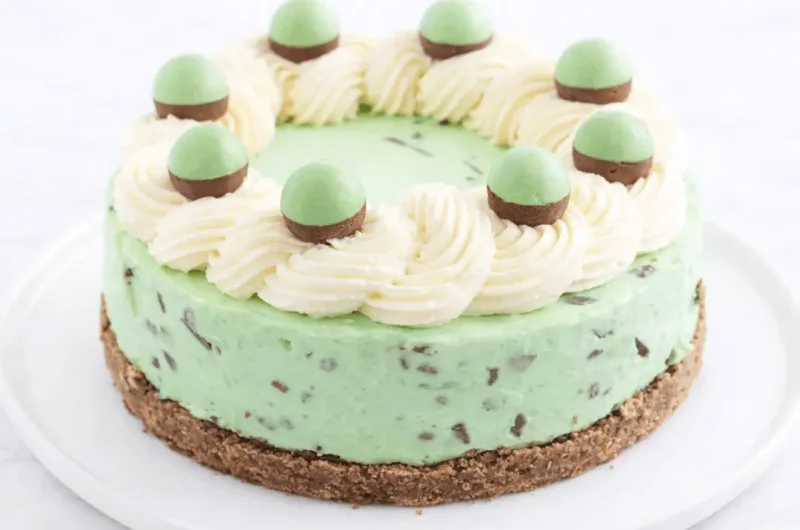
The Easiest No-Bake Mint Aero Cheesecake
Course: DessertCuisine: British, AmericanDifficulty: Easy12
Slices15
minutes6
hours480
kcal6
hours15
minutesA velvety, creamy no-bake cheesecake packed with chopped Mint Aero bars and a rich dark chocolate biscuit base. Ready in 15 minutes plus chilling time!
Ingredients
- Equipment Needed:
8-9 inch Springform Pan
Electric Mixer
Food Processor
Spatula
- Ingredients:
300g Dark Chocolate Digestive biscuits
125g Unsalted Butter, melted
500g Full-fat Cream Cheese
100g Icing Sugar
450ml Double Cream (300ml for filling, 150ml for topping)
1 tsp Peppermint Extract
Green Food Colour Gel (optional)
200g Mint Aero Chocolate bar (chopped)
100g Mint Aero Bubbles (for topping)
Directions
- Line the base of an 8 or 9-inch springform pan with parchment paper and lightly grease the sides.
- Crush biscuits into fine crumbs and mix with slightly cooled melted butter. Press firmly into the bottom of the pan and chill for 30 minutes.
- Beat cream cheese, icing sugar, peppermint extract, and food coloring until smooth.
- In a separate bowl, whisk 300ml double cream to stiff peaks.
- Gently fold the whipped cream into the cheese mixture. Fold in chopped Aero bars.
- Pour filling over the base and smooth the top. Refrigerate for at least 6 hours (overnight is best).
- To serve, remove from tin using a warm knife to loosen the edges. Whip remaining 150ml cream with a little sugar, pipe onto the cheesecake, and top with Aero Bubbles.
Notes
- Storage: Keep this beauty in the fridge! For food safety, don’t leave it out at room temperature for more than 2 hours. It stays fresh in the fridge for 3-4 days.
- The Cream Cheese: You MUST use full-fat Philadelphia (or similar). The light stuff just won’t set properly.
- Toothpaste Warning: Measure your peppermint extract. It’s strong stuff. Start with a teaspoon and taste it before adding more.
- Freezing: You can freeze the undecorated cheesecake. Once set, wrap it well and freeze for up to 3 months. Thaw overnight in the fridge before eating.