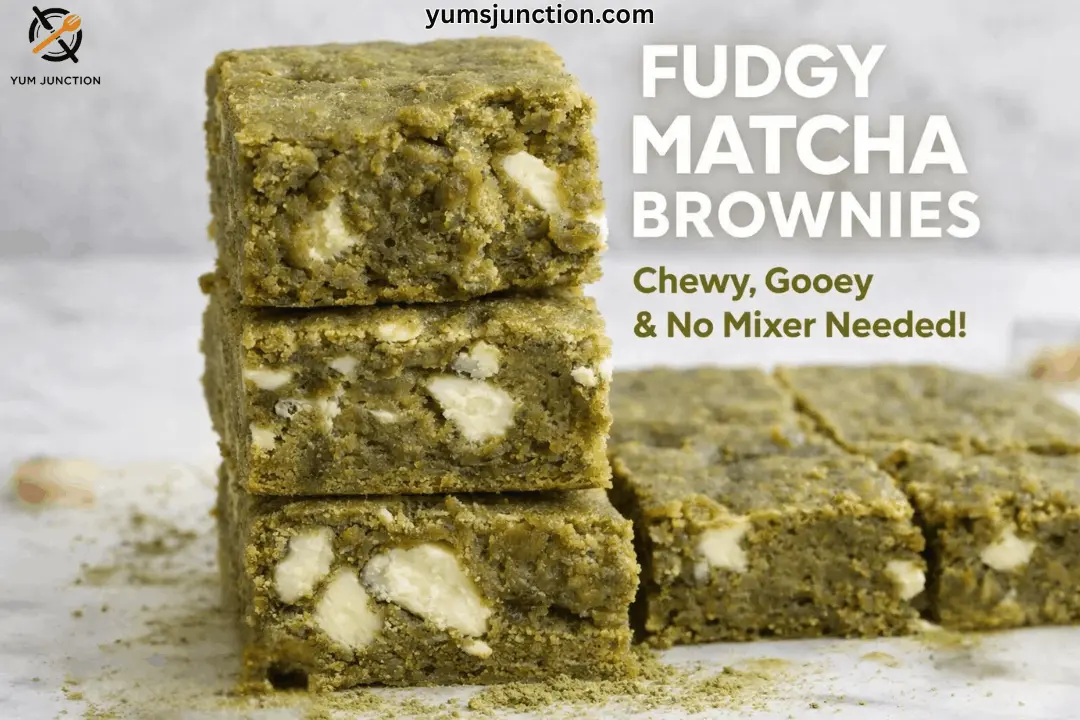
Today, we are going to make a fantastic matcha recipe. Seriously, I’m going to show you how to make my absolute favorite Matcha and White Chocolate Brownies.
You are going to enjoy this recipe!
Why You’ll Love This
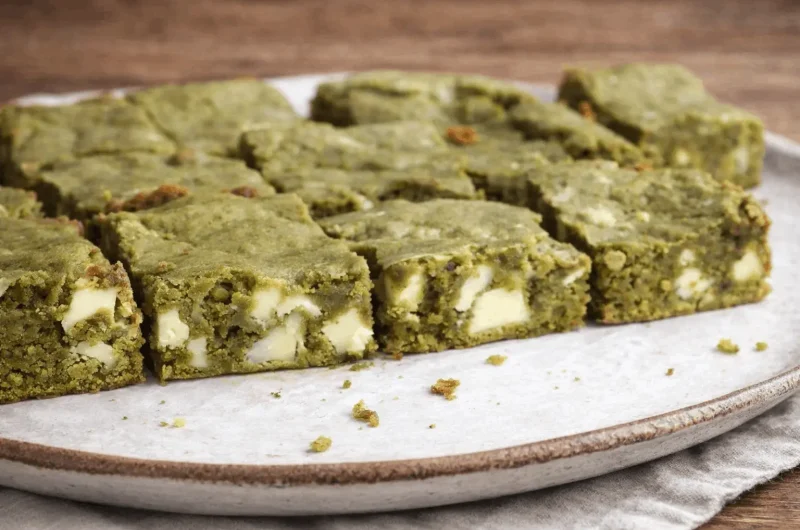
These brownies are “out of this world” when it comes to the taste of matcha and white chocolate, but mainly because of the texture. They are so chewy and so fudgy—it’s amazing and, quite frankly, impossible to beat. Plus, the method is incredibly simple. No fancy equipment, just pure flavor.
If you love this chewy magic, also try my Mochi Ice Cream at Home (Step by Step) for that next-level stretchy delight!
What You’ll Need
Special Equipment:
- 8×8 inch (20cm) square baking pan
- Parchment paper
- Whisk and spatula (no electric mixer needed)
- Small bowl (for matcha paste)
The Ingredients:
- Unsalted Butter: 115g (1/2 cup), melted and slightly cooled
- Granulated White Sugar: 100g (1/2 cup)
- Brown Sugar: 100g (1/2 cup), packed
- Vanilla Extract: 1 tsp
- Large Eggs: 2 (room temperature)
- Culinary Grade Matcha Powder: 15g (approx. 2 tbsp)
- Cold Water: 30ml (2 tbsp) — for the paste
- All-Purpose Flour: 125g (1 cup)
- Cornstarch: 1 tsp
- Baking Soda: 1/4 tsp
- Salt: 1/4 tsp (a nice pinch)
- White Chocolate: 150g (approx. 5oz), chopped from a high-quality bar
Let’s Get Baking!
1. No Mixer Needed!
First, preheat your oven to 350°F (180°C) and line your 8×8 inch pan with parchment paper.
This recipe is so easy and quick to make. You’re not going to need a standing mixer or anything complicated. Start with the melted butter in a large bowl. To that, add the granulated white sugar as well as the brown sugar.
Secret: Using both sugars is the secret to getting that perfect texture and taste. Add a splash of vanilla extract—always important in my recipes! Whisk that together for a few seconds until it’s all incorporated.
If you love this effortless no-mixer vibe, also try my Chocolate Mousse for Two (No-Bake)—just as simple and indulgent!
2. Make the Matcha Paste
Now, time to work on the matcha. Use culinary grade matcha powder and add a little bit of cold water to it in a small separate bowl. Mix this really well to create a smooth paste.
Tip: You have to be a little bit patient here, but mixing it separately first ensures we don’t have any lumps in the batter.
3. Green and Fabulous
Add that smooth green paste to the butter and sugar mixture. Everything will look green and fabulous!
Next, add the two large eggs. As you mix this in, you might notice the consistency looks a bit more like guacamole than regular brownie batter, but don’t worry—it’s okay! It’s going to be delicious.
4. The Dry Ingredients
Time to work on the dry ingredients. Add the all-purpose flour, a little baking soda (just enough to create that brownie texture without making it “cakey”), and a bit of cornstarch for that irresistible chewiness. Finally, add a nice pinch of salt—always very important when it comes to baking to balance the sweet.
Switch to a spatula and fold everything together gently until the flour basically disappears. Do not overmix.
5. The Best Chocolate for Matcha
For the mix-ins, you can definitely use dark chocolate or milk chocolate, but I personally think white chocolate is the best match. It is so sweet and delicious, which pairs perfectly with the slightly bitter taste of matcha.
Recommendation: Chop up a high-quality chocolate bar rather than using chips. Sometimes pre-made chips can be too waxy. Fold those chunks into the batter, and you are done.
If you love this white chocolate pairing, also try my Bittersweet Chocolate Truffles for a bittersweet twist that’ll blow you away!
6. Baking for the Sweet Spot
Pour the batter into the prepared pan and smooth the top. Bake for 15–20 minutes.
My sweet spot is around 18 minutes. You want the sides to be golden brown but the center to still be a bit jiggly. That is the key to fudginess!
7. Patience is Key!
Let them cool completely in the pan. I personally recommend eating these brownies cold. I know it’s hard, but always put them in the fridge for at least 2 to 3 hours before cutting them. This makes the texture dense, fudgy, and “soon-to-be-famous.”
fAQs
Why is my batter thick like guacamole?
Don’t worry, that is exactly how it should look! Because we aren’t melting chocolate into the base like a traditional brownie, the butter, sugar, and matcha paste create a thick, green emulsion. Once it hits the oven, the butter melts down and creates that fudgy texture we love.
Can I use regular chocolate chips instead of a chopped bar?
You absolutely can, but I personally recommend chopping up a high-quality white chocolate bar. Chocolate chips often have stabilizers that keep them from melting fully, which can make them a bit too sweet and waxy. Chopped bars melt into those lovely puddles of creamy goodness!
Do I have to use brown sugar?
Yes, please do! The combination of white and brown sugar is what gives these brownies their u0022out of this worldu0022 texture. The molasses in the brown sugar adds moisture and chewiness that you just can’t get with white sugar alone.
Why do I need to dissolve the matcha in water first?
Making a u0022matcha pasteu0022 is secret weapon to avoid lumps. Matcha powder is very fine and likes to clump up in batter. By mixing it with a little cold water first, we ensure the color is evenly distributed and you don’t bite into a pocket of dry bitter powder!
How do I know when they are done?
The sweet spot is usually around 18 minutes. The edges should look baked and golden, but if you shake the pan gently, the center should still jiggle slightly. If you wait until the center is firm, they will be cakey rather than fudgy. They will firm up as they cool in the fridge!
Chewy Matcha and White Chocolate Brownies
Course: DessertCuisine: Fusion / BakingDifficulty: Easy9-16
brownies15
minutes15
minutes250
kcal180
minutes3
hours5
minutesThese vibrant green brownies are chewy, fudgy, and “out of this world.” Made with a unique matcha paste method and loaded with white chocolate chunks, they offer the perfect balance of earthy tea and sweet creaminess.
Ingredients
- Equipment Needed:
8×8 inch Square Pan
Mixing Bowls
Whisk
Spatula
- Ingredients:
115g (1/2 cup) Unsalted butter, melted
100g (1/2 cup) Granulated sugar
100g (1/2 cup) Brown sugar, packed
1 tsp Vanilla extract
2 Large Eggs
15g (2 tbsp) Culinary grade Matcha Powder
30ml (2 tbsp) Cold water
125g (1 cup) All-purpose flour
1 tsp Cornstarch
1/4 tsp Baking soda
1/4 tsp Salt
150g (5 oz) White chocolate, chopped
Directions
- Preheat oven to 350°F (180°C). Line an 8×8 inch pan with parchment paper.
- In a large bowl, whisk together melted butter, white sugar, brown sugar, and vanilla.
- In a small bowl, whisk matcha powder and cold water into a smooth paste. Add this to the butter mixture.
- Whisk in eggs until combined.
- Add flour, cornstarch, baking soda, and salt. Fold with a spatula until just combined.
- Fold in the chopped white chocolate.
- Spread into the pan and bake for 15-20 minutes (center jiggly!).
- Cool completely, then refrigerate for 2-3 hours before slicing for fudgiest texture.
Notes
- The “Guacamole” Phase: Don’t panic when you add the eggs and the batter turns thick, vibrant green. It bakes into a brownie!
- Chocolate Choice: High-quality white chocolate bars (like Lindt or Ghirardelli) melt better than chips.
- Don’t Overbake: 18 minutes usually perfect. Want moist crumbs, not clean toothpick.
- Storage: Airtight in fridge up to 5 days for chewy texture.