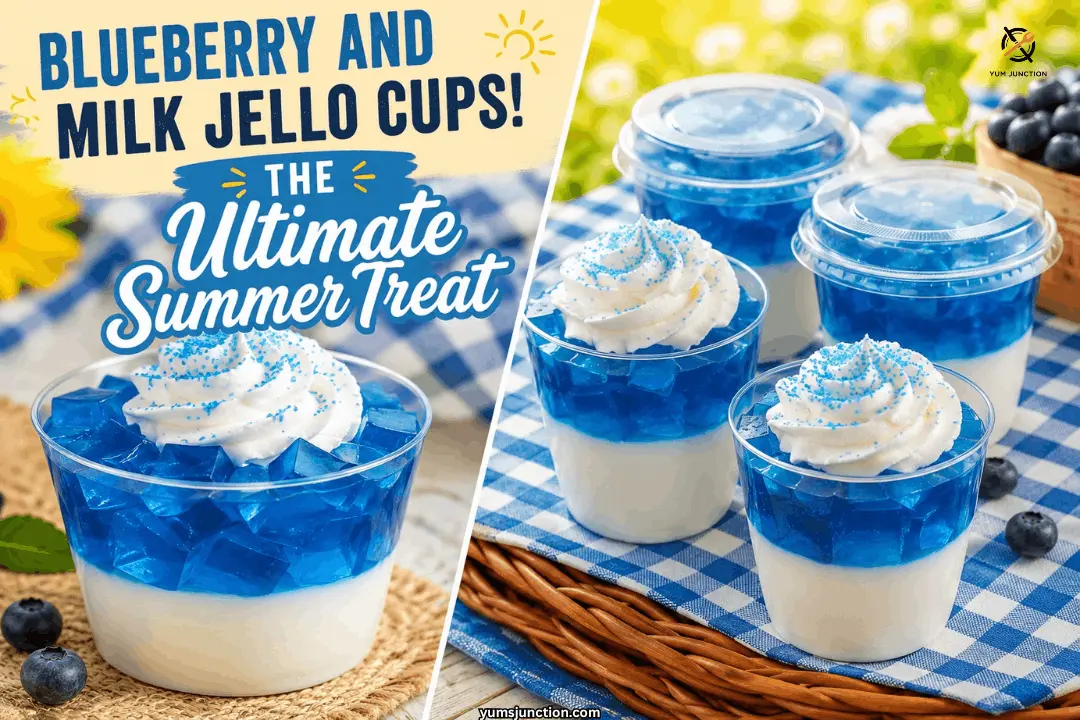
These blueberry and milk jello cups layer a creamy rice pudding milk jello base, tiny suspended blueberry jello cubes, and a clear jello top layer, all built in individual cups. It takes about 30 minutes of active prep plus roughly 2 hours of chilling across the layers, and the result is a stunning, kid-friendly, no-fuss dessert that looks like it came from a bakery.
I want to share a super fun and individual dessert recipe with you all. It is a beautiful blueberry and milk jello that I know you guys are going to absolutely love and enjoy.
Especially in this hot summer heat, treat your kids and your family to these adorable individual jello cups!
Table of Contents
Why You Will Love These Blueberry and Milk Jello Cups
- No Fighting Over Pieces! Because they are in individual cups, everyone gets their own. Honestly, when making these at home, it is a total success. The kids are not arguing over who got the bigger piece because each one just grabs their own cup, and that is it! Perfect peace, and everyone is happy.
- The Wow Factor. You can really see the tiny blue squares floating inside the see through clear jello layer. It just looks absolutely gorgeous and amazing!
- Perfect for Parties. You can easily pack these up with their little lids for picnics, or dress them up with whipped cream for a fancy party dessert.
- Simple Ingredients. It is a perfect dessert to pamper your loved ones, and the best part is we almost always have these simple ingredients right at home.
If you love a stunning, layered no-bake dessert like this one, you are also going to fall for my Woon Polamai Thai Fruit Jelly Cake, another gorgeous layered jelly dessert with suspended fruit that always gets the same wow reaction.
What You Will Need
Special Equipment
- 1 shallow baking pan, like a 9×13 inch or 8×8 inch pan, for setting the blueberry jello
- 10 to 12 clear plastic or glass individual dessert cups (approx 6 to 8 oz size) with lids
- Mixing bowls and measuring cups
- Whisk
- Spatula or knife for cutting jello cubes
The Ingredients
- 1 package (approx 4.2 oz) blueberry flavored jello powder
- 1 package (approx 4.2 oz) clear jello powder (pineapple flavor)
- 1 package (approx 4.2 oz) rice pudding jello powder (or condensed milk flavor)
- 6 cups boiling water, divided
- 3 cups regular milk
- Ready to use whipped cream, for serving
- Blue decorative sanding sugar, for serving
Let us Get Cooking!
1. How We Build the Layers
You will be using three different flavors to create this magic. A firm blueberry jello that we cut into perfect little squares, a creamy rice pudding jello made with warm milk, and a completely clear pineapple jello to lock those blue gems in place. Let us start making this delicious treat!
2. Make the Blueberry Jello
Add 3 cups of hot and boiling water to a large mixing bowl or measuring pitcher. Add the entire package of blueberry jello powder. Mix it very well for about 2 to 3 minutes to ensure everything is completely dissolved.
3. Chill the Blueberry Layer
Pour the mixed blueberry jello into a shallow pan. Place it in the refrigerator for about 20 minutes until it is nice and firm.
4. Prep the Clear Jello
In a separate container, add another 3 cups of boiling water. Add the clear pineapple jello powder and mix for 2 to 3 minutes until completely dissolved. Set this aside to cool down completely to room temperature.
5. Warm the Milk
Pour the 3 cups of regular milk into a pot on the stove. Heat the milk while stirring occasionally until it is nice and hot. Do not let it boil! When you see it start bubbling around the edges, remove it completely from the heat.
6. Make the Milk Jello
Carefully add the rice pudding jello powder into the hot milk so you do not get burned. Whisk for 2 to 3 minutes until perfectly dissolved. Let the milk mixture rest for about 20 minutes until it cools to a nice room temperature.
7. Pour the Milk Layer
Line up your little cups. Pour the room temperature milk jello mixture into the cups, filling them about halfway up. Try to add the same amount to each one. Place the cups in the refrigerator for 20 minutes until firm.
8. Cut the Blueberry Cubes
Once the blueberry jello in the pan is nice and firm, cut it into tiny little squares using a spatula or knife. Take your time to make them really tiny because they will look beautiful! Gently separate them completely.
9. Assemble the Cubes
Remove the cups from the fridge once the milk layer is firm. Fill the rest of the cup almost to the top with the tiny blue squares, distributing them really nicely.
If you love a make-ahead treat you can prep the day before serving, my No-Bake Strawberry Icebox Cake is another gorgeous, crowd-friendly dessert built for exactly that.
10. Add the Clear Layer
The secret to making these look perfect is temperature! You have to make sure your clear jello is completely cooled to room temperature before you pour it over the blue cubes. If it is warm, it is literally going to dissolve the little blue squares, and we do not want that! Pour the room temperature clear jello over the blue cubes.
11. Final Chill
Place the filled cups back into the refrigerator for about 1 hour (or at least 30 minutes) until everything is nice, firm, and fully set.
12. Garnish and Serve
At the end, I like to give you two options. Keep it simple by popping the lid on to save on extra calories, or go for the fancy way with a generous swirl of whipped cream and a sprinkle of blue decorative sugar right on top for that extra wow factor!
How to Store and Transport Blueberry Jello Cups
- Refrigerator: Store the finished cups covered or with their lids on for up to 3 to 4 days.
- Transporting for picnics: Because this dessert has a milk-based layer, it needs to stay cold. If you are packing these for a picnic or an outdoor summer party, transport them in a cooler with ice packs and avoid leaving them out in direct heat for more than an hour or two.
- Freezer: Freezing is not recommended, since the texture of set jello and milk jello both change significantly and become watery once thawed.
If you like this recipe Explore more recipes
FAQs
Can you make jello with milk instead of water?
Yes, absolutely! Replacing water with milk yields a wonderfully creamy and rich dessert, which is exactly what we do for our rice pudding layer! However, you must be careful to heat the milk until it is just bubbling at the edges, but never bring it to a rolling boil. Boiling can scald the milk or cause the mixture to separate.
How do you prevent the jello layers from melting together?
Timing and temperature are everything, my friends! If you pour warm jello liquid over a set layer, it will melt it and ruin your beautiful clean lines. Always make sure your next layer has cooled completely to room temperature before pouring it into the cups.
How long does it take for individual jello cups to set?
Because individual cups hold a much smaller amount of liquid than a big baking dish, they set much faster! Each individual layer in this recipe will get nice and firm in just about 20 minutes in the refrigerator. The final and completed cups will be fully set and ready for the kids to eat in about 1 hour.
Where can I find clear pineapple or rice pudding jello?
These specific and delicious flavors are very popular in Mexican desserts! You can easily find them in the Hispanic food aisle of most major grocery stores, usually under brands like D’Gari or Pronto. They come in convenient 4.2 oz boxes that work perfectly with the measurements in this recipe.
Can I use different fruit flavors or colors for these jello cups?
Absolutely! This layering technique works beautifully with almost any jello cups with fruit combination. Swap the blueberry for strawberry, raspberry, or lime jello for a completely different color palette, or match the flavors to a party theme or holiday. The key technique stays exactly the same: cut your colored jello into cubes, layer it over the milk jello, and top with the cooled clear jello to lock everything in place.
Is this recipe vegetarian?
This recipe is not vegetarian or vegan as written, since standard jello powder contains gelatin derived from animal collagen. If you need a plant-based version, agar agar can work as a substitute, though it sets differently and would need its own tested ratios rather than a direct 1:1 swap.
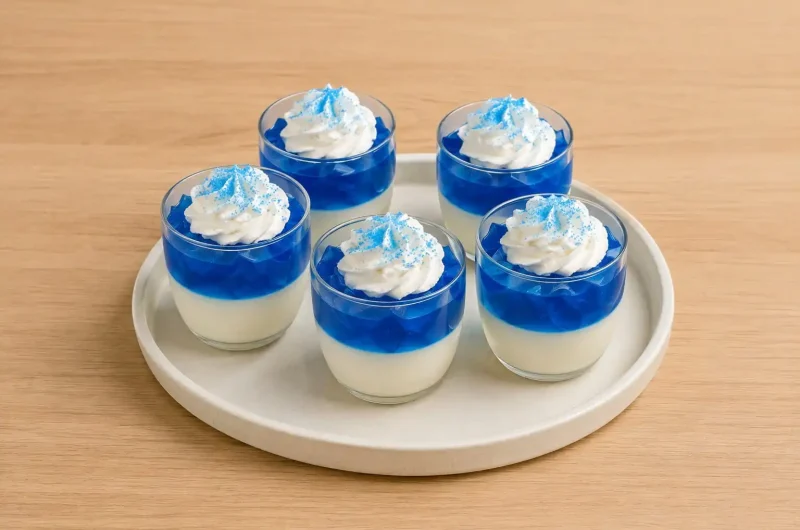
Blueberry and Milk Individual Jello Cups
Course: DessertCuisine: Mexican, AmericanDifficulty: Easy12
individual cups30
minutes5
minutes140
kcal`100
minutes2
hours15
minutesA fun, gorgeous, and refreshing individual dessert featuring a creamy rice pudding milk layer topped with tiny blueberry jello cubes suspended in a sweet, clear pineapple laye
Ingredients
- Equipment Needed:
Shallow baking pan, 8×8 or 9×13 inch
10 to 12 clear individual dessert cups, 6 to 8 oz, with lids
Mixing bowls
Whisk
- Ingredients:
1 package (120g / 4.2 oz) blueberry flavored jello powder, water-based
1 package (120g / 4.2 oz) clear pineapple flavored jello powder, water-based
1 package (120g / 4.2 oz) rice pudding jello powder, milk-based
1.4 liters (6 cups) boiling water, divided
710ml (3 cups) regular whole milk
Whipped cream, for garnish
Blue decorative sanding sugar, for garnish
Directions
- In a bowl, whisk 3 cups of boiling water with the blueberry jello powder for 2 to 3 minutes until fully dissolved. Pour into a shallow pan and refrigerate for 20 minutes until firm.
- In a separate bowl, whisk the remaining 3 cups of boiling water with the clear pineapple jello powder for 2 to 3 minutes. Set aside to cool completely to room temperature.
- Heat 3 cups of milk in a saucepan over medium heat until hot and bubbling at the edges. Do not bring to a rolling boil. Remove from heat.
- Whisk the rice pudding jello powder into the hot milk for 2 to 3 minutes until dissolved. Let sit for 20 minutes to cool to room temperature.
- Evenly divide the cooled milk jello among your clear cups, filling them about halfway. Refrigerate for 20 minutes until the milk layer sets firm.
- Once the blueberry jello is firm, cut it into tiny bite-sized squares. Gently separate the pieces.
- Top the set milk jello layers with the tiny blueberry jello squares, filling the cups almost to the rim.
- Carefully pour the cooled, room-temperature clear jello over the blueberry squares to encapsulate them.
- Refrigerate the cups for 1 hour, or until completely firm.
- Serve with lids for easy transport, or top with whipped cream and blue decorative sugar.
Notes
- Jello Brands: To get rice pudding (Arroz con Leche) and clear pineapple (Piña Cristalina) flavors, look for Mexican gelatin brands like D’Gari or Pronto in the Hispanic aisle of your grocery store. Standard 4.2 oz packets work perfectly with the 3 cup liquid ratio used here.
- Temperature is Key: Never pour warm clear jello over your blue cubes, or the color will bleed and the cubes will melt. Always wait until it is fully cooled to room temperature.
- Milk Warning: Do not boil the milk. Heating it just until it bubbles at the edges is enough to dissolve the gelatin without scalding it.
- Kids and Small Pieces: These cubes are soft but still firm gelatin pieces. As with any small-piece food, supervise very young children and toddlers while eating.
- Not Vegetarian: Standard jello contains animal-derived gelatin. Not suitable for vegetarian or vegan diets as written.
- Transport Safety: This dessert contains a milk layer. Keep chilled and transport in a cooler for picnics or outdoor summer events.
- Nutrition: Calories are estimated, without whipped cream, and will vary based on cup size and jello brand.